Showing posts with label learning. Show all posts

Monday, January 2, 2012

First Custom Action Figure Complete

New Year is a time for many things.  Resolutions.  Hangovers.  Actually getting some snow in Minnesota for the first time this winter.  And new beginnings.  Which means its time to be done with the First Custom Action Figure Project.

Applying the clear coat.
As I write this paragraph, I am waiting for the sealant to dry on the figure so I can reassemble it.  While I wait, I'll reflect on what I did well and what I didn't do so well in this project.

What I did well.

1. Got a clue.  I wanted to do some custom painting, but I didn't know jack about how to actually paint.  I read some forums, watched some youtube videos, and found several great tutorials, but the problem with that was that most of them assumed the reader/viewer had at least some background with painting.  I didn't, so I bought some books aimed at beginners.  This was a good move.

2. Fully disassembled the figure before I began painting it.  Yes, it took time and was irritating, but it made painting everything much, much, easier.

3. Rotary Tool down the rub zones.  Again, this took time, but I think it was the right way to go, if all of the folks on the internet who know what they are doing are to be trusted.

4. Priming the figure.  Some people do not prime their work pieces before they paint.  Those people are taking the quick and easy way.  That is the path to the Dark Side.  If want are taking the time to actually customize a toy, take the time to do it right.  Primer makes the paint adhere to the object being painted.  I don't know about the rest of you, but I expect my customs to be family heirlooms that David Draper XXXVCII  hands down to his children.  That means I want them to last.  That means I prime my damn figures.

5. Come up with a color scheme before hand.  This was a very good idea.  I knew what I wanted.  That made it possible for me to not second guess myself when I was painting, which was good, because at my beginner level of painting I need to be able to concentrate completely on the actual painting, not on doubts I have about the choice of paint.

What I didn't do well.

1. I didn't know my paints.  Just because something looks one way in the bottle does not mean its going that way when it is applied to a surface.  That's a grade school mistake.  I ended up making swatches of all my paints, but I should have done this before I started.  It won't happen again.

2. I painted myself into a corner.  By painting details like eyes and ammo onto my figure, I made it impossible to paint a wash onto the figure without screwing that stuff up.  Washes are watered down mixtures of dark paint that fall into the recesses of a model and give the illusion of shadows and depth.  I could repaint, but eh.  Now I know the correct order to paint a model (once it is primed) is:

  1. Apply the base coats.
  2. Apply wash.
  3. Apply details. 
I won't screw that one up next time.

3. I didn't layer my paint.  When I started the project, I incorrectly thought the idea was to paint dark colors onto the object first, then lighter colors because the darker colors would show throw the lighter ones.  Yeah.  Not so much.  Lighter colors are painted on top of darker ones so the lower, more recessed areas of a model look darker, which, like the washes, helps give a sense of depth and and shadow.  I get that now.  I didn't when I started this project.

Ok- I think the clear coat should be dry now.  I'm going to go get everything from the porch and try to reassemble the figure.  Through the magic of blogging, you won't even notice the gap of time between when you read this paragraph and the next, even though the next will will be written minutes to half an hour after this one!

...

PEG!  GET INTO THAT SOCKET!!!!
Ok.  This is the project that will not die.

All I had to do was reassemble the figure, right?  How hard could that be?

Ha ha ha!  Funny!  Ha ha ha!

These are the joys of doing something for the first time.  Surprisingly long and rather frustrating story short: the little pegs that go in the joints did not want to go back into the joints.  At all.  No matter how hard I pushed, they only went in about half way.  So I had to come up with a plan.  Here is what I did.

Fire it up! Fire it up! Fire it up!
1. Use a hair dryer to heat up the joints and make the plastic nice and flexible.
2. Insert peg.
3. Use my little desk vice with rubber grabbers to CRUSH THE *&^% JOINTS back together.

And this worked great, except for one thing.

THE *&^%^$^%#$ &$^%$#%^_)(*(*$&# vice rubbed the paint right off the pegs!!!!!

So some touch up work was needed.

I THOUGHT I WAS DONE WITH THE PAINTING PHASE!

Talhk, you Svine!  Vee haav your friends in Astreeah!!
Yeah. 

Not so much.

In any case, things are back on track now.  As I type this, the second coat of paint is drying on the ends of the pegs viable from within each joint.  I am very happy that I had my little desk vice here- without it, I would have never been able to get those pegs back into their sockets. If and when this phase of the project is complete, my little desk vice is getting the MVP for this inning of play.

I really was not ready for the pegs to not pretty much slide right back into the joints. Sure, I figured I would need to heat the joints up again, but I thought that they would be soft enough for the peg to fit back in, but it became pretty clear pretty fast that this method was not going to work.  Thank goodness for the vice.  Too bad the paint came off.

Enough stalling... I think the paint should be dry at this point (my paint dries in about 20 minutes, and I only needed a bit, so it should be good now.)  Be right back.

...

Ladies and gentlemen.  It is with great pleasure that I introduce to you, the NEW and IMPROVED Kinji "Rain" Shinto, of The Corps.  First a quick run back down memory lane- here is what he looked like fresh out of the package:

From the front.

From the back.


And here is what he looks like now!

Woo hoo!

Yee ha!!

Alright!!!

WE DONE!

I'm really happy with how this turned out.  I learned a lot of stuff from this project that I will be able to apply to future work.  And it ended up looking pretty good.  I'm pretty stoked right now.

Yeah baby!

This is a good time to mention I could have never finished this project without the support of many people, including most of all my wife, who was nothing but supportive of me spending so much of my free time here in my workshop putting this together.  I would also like to thank Mystic, Numbers, and all the rest of the folks who had supportive comments and advice here on the blog and in the threads on HissTank.com.

I had a great time with this project, but I am also glad to move on to the next one.  It is going to be a vehicle.  Alpha class.  I think you know what project I am talking about.  If not, tune in next week at the latest to see.

Until next time,

David D.

Monday, December 12, 2011

Figure Painting, Part 1

I found myself with some extra time this evening (now yesterday evening) after getting home from a family holiday party, so I decided I would get to it and start painting.  I wasn't expecting to have time to do get started with the actual paint step until at least next week, so this was a pleasant surprise. I've been both looking forward to this and dreading it for a while; it is time to just get started.

black coat over black primer, white dry brushed, and
now a few layers of medium gray paint over everything else.
I began by putting a black base coat over the black primer I previous applied.  That step was no problem.  I then did some dry brushing of white paint onto different surfaces, because I understand that painting over lighter colors can impact the intensity of the paint that over over it.  It was my first time dry brushing, and I think it turned out alright. 

I wish I had taken more pictures of everything as I was doing it, but I was too engrossed in the act of painting to step back and stop to take pictures of each phase.  Next time.

After I got done with the dry brushing, I moved on to painting a darker gray onto the areas of the figure that I meant to end up gray- the body armor, gloves, boots, pockets, etc.  That went pretty well.  I am using Folk Art acrylic paints  from Plaid.  I use their paint because it comes in a ton of colors, its super inexpensive ($0.79 per 2 ounce bottle) and it seems to be good quality stuff.

One principle I saw in practice while painting the gray was color vs. coverage.  This idea is covered on page 50 of How To Paint Citadel Miniatures, and the idea is this: when it comes to paint, there is a trade off between the brightness of colors and their capacity to cover a surface in a single coat.  Some paint is made to cover objects in one or two coats.  In this case, the colors tend to be dull.  On the other hand, paints can be formulated to have bright colors, but in order to achieve these colors, several coats may need to be applied, as each individual coat is relatively translucent.  The former type of paint was the factor with the gray. After two coats, it didn't look very impressive, but after four, it looked amazing. 

on the left we have the medium gray, and on the right
we have steel gray on top of the medium gray.
Steel gray is kind of like barely dirty mob bucket water gray.
However, I do fine myself stuck at the moment.  I thought that I would use a darker color gray (medium gray) to be the first color layer of the armor, and then I would move to lighter colors of gray to give the sense of definition, shadow and high lighting to the figure.  Everything was great until I added the next layer of gray, which was steel gray.  On figure, the steel gray looks almost white.  The pictures here don't really do it justice; I need to learn how to white balance my photos before I upload them, but that's something for me to learn on another day.

The darker gray does give the illusion of shadows in the folds and recesses of the shape, but the really light color of the gray doesn't look good at all; it really isn't what I want. I'm not sure at this point what to try next. Maybe I should repaint the parts where I used the steel gray on with the medium gray, and try to find a gray paint that is closer to medium gray in darkness but still a little bit lighter than the medium gray.

I am looking at the Plaid colors online as I write this, and it looks like there several grays in the spectrum I could purchase, and the steel gray swatch on the website looks much whiter than the bottle I have here.  That makes sense.  I think my next step will be to run to the store when I can and grabbing battleship gray and dark gray, and doing some experimenting with dark gray, battleship gray and medium gray.  Based on how those look, I'll make a choice about what paints I want to use going forward.

Ok- so that's the plan.  Find those other colors at the store and report back to the workshop when I have time.  More news as it happens.

Until next time,

David D.

Sunday, November 27, 2011

Step One Complete

Hey folks.  Its been a busy Thanksgiving week and weekend.  My best friend Matt came to town.  He is a resident doc at a Big Deal hospital on the East Coast.  He and I met in college, and despite being one of, if not the smartest people I have ever met, he is completely down to earth and cool.   He is a giant video game nut and we spent plenty of time (when we weren't stuffing ourselves silly with too much food) on the playstation, hanging out, and just having a good time.  It was great.  I hope you all had a good Thanksgiving too if you celebrate it, or a good "lets celebrate the help that the native peoples gave starving strangers in a strange land, only to have those strangers decided to take over and kill the people who helped them" weekend, or, if you are not from the USA, a good "oh jeez, those crazy Americas are getting even fatter this weekend" weekend.

Oh shoot!  All my fellow readers from the USA are gone!

Anyway, for the 30% (now 100%!) or so of the readers from outside the USA still here...

When in doubt, read it out.
First announcement- my wife Laura, Matt and I ran to the mall at some point this weekend.  Laura picked up a present for me: Acrylic Painting for Dummies.  I'm a huge fan of the For Dummies series.  I've gone through at least a dozen of their books for IT related stuff, including Excel 2003 for dummies, Networks for Dummies, PCs for Dummies, Photoshop for Dummies, TCP/IP for Dummies, Unix for Dummies, etc.  They are great books written for beginners but have a tremendous amount of information in them and can serve as great references later on.  Each chapter is pretty well self contained, so you can skip the sections you aren't interested in reading or don't need to read without screwing yourself later on.  I would love to take some classes on acrylic painting to learn some brush techniques and just general tips about painting, but what I have found doesn't really fit into my schedule.  We have an extensive community ed program in St. Paul, MN where I live, but the classes tend to be at night, and I already go to school at night, or, since I work as a life skills worker with teen guys, tend to have my client sessions at night, and thus, those classes don't work.  Between Acrylic Painting for Dummies and the book mentioned grabbing in my last post, How to Paint Citadel Miniatures, I think I'll be able to teach myself plenty in the weeks ahead.  It makes me feel like I'm going to have the know how to pick up my figure painting game and make some progress detailing my figures.

Yeah, that was a pretty intensely dorky sentence.  Moving on to the real meat of the update.

So where am I with the current project?

Revisions with the master plan have already taken place.  I was originally planning on dremeling down the rub zones, such as the knee, shoulder and elbow joints, on the figure, and then taking it apart.  Well, I tried that but the dremel had a hard time getting the joints without rubbing on the rest of the figure.  I didn't do much damage, but I noticed that things were not going according to plan.

So an alteration is in order:

Old:

1. dremel down the the rub points in the shoulders, elbows, hips and knees. 
2. disassemble the figure, including removing the lower legs/arms from the upper legs arms through the use of a hair dryer. 

OUTDATED.  DELETE OBSOLETE INSTRUCTIONS.  OVERWRITE.

New: 

1. disassemble the figure, including removing the lower legs/arms from the upper legs arms through the use of a hair dryer.
2. dremel down the the rub points in the shoulders, elbows and knees. 

INSTRUCTIONS UPDATED.  

PLAN ALTERATION COMPLETE. 

Score one for the The Corps action figures:
They are easy to take apart.
The good news is that it is really, really easy to take apart action figures from The Corps line. A single screw in the back holds the figure together.  That screw is easily reached by a Phillips head screw driver (sorry, don't remember the size, but it isn't an exotic gauge or incredibly small or anything like that- I had the right sized screw driver in my work bench.) Once the screw is removed, the front and back torso of the action figure come apart, and the waist, arms and head are easily removed.  Besides the screw itself, there are no other methods of fastening the figure together. No body cracking with a vice like you evidently need to do with modern GI Joe figures is necessarily, which is kind of nice.  The less opportunity for screw ups, I think, the better I will do at this point.

My wife's hairdryer to the rescue!
At the same time, this level of disassembly does not make it any easier to actually dremel down the knee, elbow or shoulder joints.  More work needs to be done to separate those parts.

Thankfully, I have done enough research about taking action figures apart to know there are two good and worthwhile methods to use here: either heat a joint with a hairdryer or put the pieces in a cup of water that has been in the microwave for a minute or so.  Because it seemed the hairdryer method would be easier to use if I needed to reheat the plastic, I went with that. 

Protect your digits.  Don't put them in front
of  streams of super hot air from hairdryers. 
Instead, put  plastic held by clothespins in front
of steams  of super hot air from hairdryers.

In order to keep from burning my fingers, I used a clothespin to hold the plastic limbs.   This kept my fingers from getting fried and allowed me to hold the plastic in front of the hairdryer set on hot for about 60 seconds, which is about what it seemed to take to get the plastic warm enough to pop the various joints.  While holding each joint in front of the hair dryer, I slowly turned the limb so that the joint was heated on all sides.

Another tool that helped to pop the joints apart was my Eklind multihex key tool.  These are great little tools that can be found for about $2 or $3 at the hardware store.  I used the smallest hex key on my foldout set to pry into the spaces of the joint and push the hot, flexible plastic apart.  The smallest tool on my kit was 5/64th inch or thereabouts, and the metal on plastic gave me a lot more leverage than I could have mustered using my fingers and fingernails alone.

And this little piggy pries plastic
joints apart all the way home.
The key to this step was patience.  The plastic is pretty malleable after 60 seconds of hot air from the hairdryer, and I was worried that I could tear it with the hex key if I got too rough.  Also, the plastic becomes cool fast.  I found that I had a good 20 seconds to work with the plastic after 60 seconds of heating.  Using my fingers alone didn't seem fast enough to take the joints apart.  If I couldn't get the joints popped in 20 seconds, I applied another round of 60 seconds of hot air to the joints, and tried again.

Eventually, everything worked just fine.  I went to school on the first few joints, and applied what I learned to the rest.  Each joint in this action figure was held together by a little peg.  The pegs had big end and small end, which will be nice later on because when I reassemble the figure, there is only one way for the pegs to be put back into each joint.  I learned quickly that trying to pry the small side of the peg from the joint was a much faster way to take the joint apart than by trying the big side or trying to pry both sides at once.  In a few minutes, I had all the joints popped apart.

Woo hoo!
I gotta say, it was pretty satisfying to see Shinto-San all taken apart without any parts broken or other mistakes made at this point.  I could have tried to break the figure down even further: the pin joints of the elbows have pegs in them that attach them to the upper arm, allowing the joint to rotate in 3 dimensions, and the hips are connected to the lower torso by peg joints as well.  In both of these cases, I didn't think there was much give going on there to pop the joints, and I also didn't think these were vital areas to pop to make painting easier or dremel work look better, so I let sleeping dogs lie.

Because there were so many parts and because my wife and I have two loving, wonderful, sweet, and completely ADHD cats who will play with *anything* they can get their paws on that isn't nailed down, I have put all the pieces of the figure into little compartments to keep them secured. Each of the joint pegs are unique to the joint they fit into, so finding the correct peg for each joint should not be a deal later on, but I still separated the parts by portion of the body.  Even without cats, I didn't want to throw all of the parts into a drawer or something; they are small, and I figure the work I am putting into this project make taking a little care of accounting for all of the parts well warranted.  I would *hate* to get nearly done with all of this only to realize a forearm or knee joint was missing.

So that is where I am at the moment.  Finals are coming up, and I've got a ton of papers to research for and then write, but I hope to have at least all of the rub areas dremeled down and have an update on the project inside of a week.  Take care.

Until next time,

David D.

Thursday, October 20, 2011

We done, baby. We done.

Well, its official.  The Build-A-HQ project has been built. This morning, I cemented the last video panel in, just above its one inch styrene conduit, waited 30 minutes, and called it complete.   Here are the photos.

Busy night in the TOC.
First a shot of the Tactical Operations Center itself.   I played around with a few different figures, but Cover Girl, Pit Commando, (aka Red Shirt), Helix, and Mainframe just looked the best staffing the workstations themselves.  I put Mainframe's computer next to him on the back wall desk, and General Hawk's briefcase computer next to Cover Girl. They are nice accessories and fit in well here.  I've got Sargent Stone briefing General Hawk in the front.  The graphics Vexar Designs made to go with their Build a HQ design are fantastic. I purchased both clear and white project paper to print the graphics on, and my advice for anyone else trying this is to print your decals out on the white paper, and trim the white edges off.  The clear paper, especially when it is being placed on dark styrene, ends up looking too dark and the stickers become hard to see.  The white paper keeps the ink fresh and bright regardless of what color styrene you put the decal on.  If you have to use clear sticker project paper, use it for graphics that are going to go on white styrene surfaces.

Snake Eyes is glad to be home.
Next up we have the lobby; Scarlet and Snake Eyes are back from who knows where.  Ripcord is clearly happy to see Scarlet back, and Duke keeps an eye on the feeds from the security cameras around the base.  Oh yeah- one thing I still may do is build a little Cisco IP phone for Duke to have at the reception/security desk so he can keep in touch with the rest of the base.  Back before I started grad school, I worked at an IT company and we all had IP phones on our desks. They looked pretty cool.  They were also completely redundant, because when you have IP phone systems, you can actually answer your phone using your computer itself.  We all had wireless headsets anyway, so we didn't need a phone handset or a deskset.  There was a little app we had installed on our laptops to place calls choice voice mail, etc, and any calls themselves placed using this app would be routed via Bluetooth to our headsets, which we were always suppose to have in our ears.  But people are just used to having phones on their desks.  I think having an IP phone at the security/reception desk would just be a nice touch, and as soon as I can find an image I can turn into a decal, I am making Duke his own little deskset phone, which is technically unnecessary, but something I think will look cool and useful on his desk.

Stg. Stone updates General Hawk on global ops status
Ok, here are Stone and Hawk.  Check out the beauty and detail in Vexar's decal images. In this picture you have a world map with different hotspots in red, a satellite image at the Pit Commando's left workstation (lower right side of the image), a sound wave analysis of Destro's voice and a work screen at Helix's workstation (lower left side of the image) and a keypad just to the right of Hawk on the right middle section of the image.  Vexar spent some time putting these things together.  I printed them up at highest quality on my HP deskjet printer, and they look crisp and near lifelike, as if they could plausibly be the kinds of screens one would see on computers performing the various tasks in a tactical operations center.

Scarlet checks in.
At my old job, the company I worked for was global and dealt with some security related services.  In one of our buildings, we had a TOC with a window between it and the lobby so potential clients could walk past and be impressed with our sophistication.  I never worked in that room, but I knew people who did.  They said it was actually a pain in the ass to work in there because while they always had the newest hardware, that also meant they were also always fixing bugs in the new machines and that everything in there felt like it was for show instead of actually being useful for the business.  Which I'm guessing was probably close to the truth.  

In the next image I've got going here (just above this paragraph) is the lobby from the right side.  You can't see Duke's keyboard or mouse (yeah, I cemented the mouse to the desk- it isn't going anywhere, and I decided it was a wireless mouse, so I didn't have to make any kind of cord between it and some part of the desk.) You can see the Exit, keypad and security screens decals here.  I think we kind of have a love triangle going on here between Scarlet, Ripcord and Snake Eyes.  Sorry Rip, I've got my money on SE.  He's got the strong silent type thing *down*.  Nothing personal, but that is what Scarlet is into and I don't think anyone can compete in that arena with Snake Eyes.

Helix, Mainframe, Cover girl and Red Shirt process their feeds.
Ok- Next image is of the TOC from the left side  Yes, the first thing I will always see here is the fact that the right most screen of Cover Girl's workstation is about 1/16th of an inch lower than her other computers.  I could try to pull the screen off and re-cement it, but the desk itself is *extremely* fragile, and comes disconnected from the rest of the dio if you look at it too hard, much less try to pull a piece of cemented styrene off of it.  I have thought about redoing that screen many times, but the fear of having to fix who knows what else keeps me from doing it.  I'll just have to live with the results, even if it gives me the heebie jeebies. I think Mainframe and Helix would make a good team together.  Helix strikes me as a kind of computer wizkid, and Mainframe looks ever the tech guru, like the kind of guy who writes COBOL code in his sleep, whereas she is more a Ruby on Rails kind of girl.  Yes, I don't think you'd ever seen developers or engineers working a TOC in real life, but its a flavor thing.  More than techie, I am going for a non-combat look in the TOC, and there aren't many non-combat looking figures in the GI JOE universe.  Beggars can't be choosers.

Never a dull moment.
Here it is- the entire thing on one overhead shot.  I don't know if I mentioned it before, but all the chairs swivel. None of them can turn a full 360 because the back of the chair bumps up against the desk, but none of the chair backs will hit each other in this dio, so I can have my TOC staffers turn to each other for a conversation or have Cover Girl or Mainframe twist to check out the computers next to them on the desk.  Everyone could turn toward the back of the room if they needed to give General Hawk their full attention.  Duke, in his security desk seat, can spin there too.  It gives a little action feature capacity to what is otherwise a cool but utterly frozen in time diorama.

Well, that is it for this project.  I'm thrilled with how it went, and I hope you like the results.  I do have some plans for a next project- Dr. Mindbender is going to get a robotics lab from Cobra Commander and work on the next generation of cobra food soldier there.  Before I work on that project, I may work on the long neglected Clipper custom.  I should give that one some time.  It has been sitting on the edge of my workstation for a long time now.  ::sigh:: that means I'm going to have to brush paint again.  We'll see how that goes.

Until next time,

David D.

Sunday, October 9, 2011

Chairs made and stickers up!


Peg warmer Duke is now warming the security
desk chair in my soon to be completed GI Joe
Lobby and Tactical Operations Center model.
Well, its been a busy past few days in Lake Woebegone.  Got the chairs made and am starting to work on the computers.  I got some sticker project paper from Office Max nearby, both the clear sticker paper and the white stuff for the decals, and have started putting it all together.  So far, so good.  Its a slow slog, especially with the computers.  Each computer screen is three pieces, and there are going to be a total of 12 computers and four keyboards.  It'll take some time to get all that cut and ready, but its looking good in the mean time.

The chairs were super easy.  I was not sure if I'd be able to bend the styrene well, but all it took was a little exposure to a small flame, as discussed in the project instructions. I used a candle lighter we had in our junk drawer, and I did it outside and with a mask on, because I figure styrene fumes are probably not the best for my health.  Turns out that a few  seconds of flame exposure makes styrene super flexible.  Just to be safe, I marked the parts of the plastic where I wanted things to bend, and put the flame on each face in the zone where I wanted it to bend- front, back, and both sides.  I was not sure if the heat would be conducted through the plastic, and I'd rather not snap good material.  I probably held the plastic just above the tip of the flame for about seven or eight seconds per side for a single round- I didn't need to heat sides again after I cooked them the first time.  It worked so well on the back of the first chair that I kept doing it for the remaining four, and had no problems with any of them.

Chair in place, stickers coming along, and all I really have
left are the computer screens.  I hope to have this thing done
in the next few days.
I printed the decals from page three of the decals website at Vexar Designs (again, thanks very much Vexar).  They printed out a little small. It seems to me that they should be between 50%-100% bigger to be the same size as they look at on the Vexar Designs site pictures, but I'll manage.  If I do this again, I'd try using an image editing program to increase the size of the stickers by 50% and see how that works, but the moment is passed.  Nothing looks really bad, and actually, the stickers make things look much, much cooler, as they always do when it comes to GI Joe related stuff.

I also noticed (learning tip!) that any stickers that are going to end up on black styrene really need to be printed on white paper, because if it is on clear, it vanishes when it is put over the black background.  Made that mistake with the world map on the back war of the Tac Ops center, but it isn't too bad.  There are plenty of decals that will be stuck on white styrene that clear stickers will find a home someplace.

Other big learning point: I was hoping this item would be strong enough to actually handle play like a playset would.  Well, not so much.  The desks themselves are very fragile.  Not the entire structures, but if you put more than a little pressure on the desk surfaces, they pop right off whatever they are glued to.  This styrene set is going to be more of a diorama than a playset, but that's cool. It looks pretty sweet.

I need to get back to cutting black styrene for the computer screens, so I'll end this update here.

Until next time,

David D.

Friday, September 30, 2011

State of the HQ

Well, I got a lot of work done on the HQ today.  And I've learned a lot about working with styrene.  The styrene lessons learned discussion will go in a future post, but I wanted to do a quick update on how things look with the model itself.

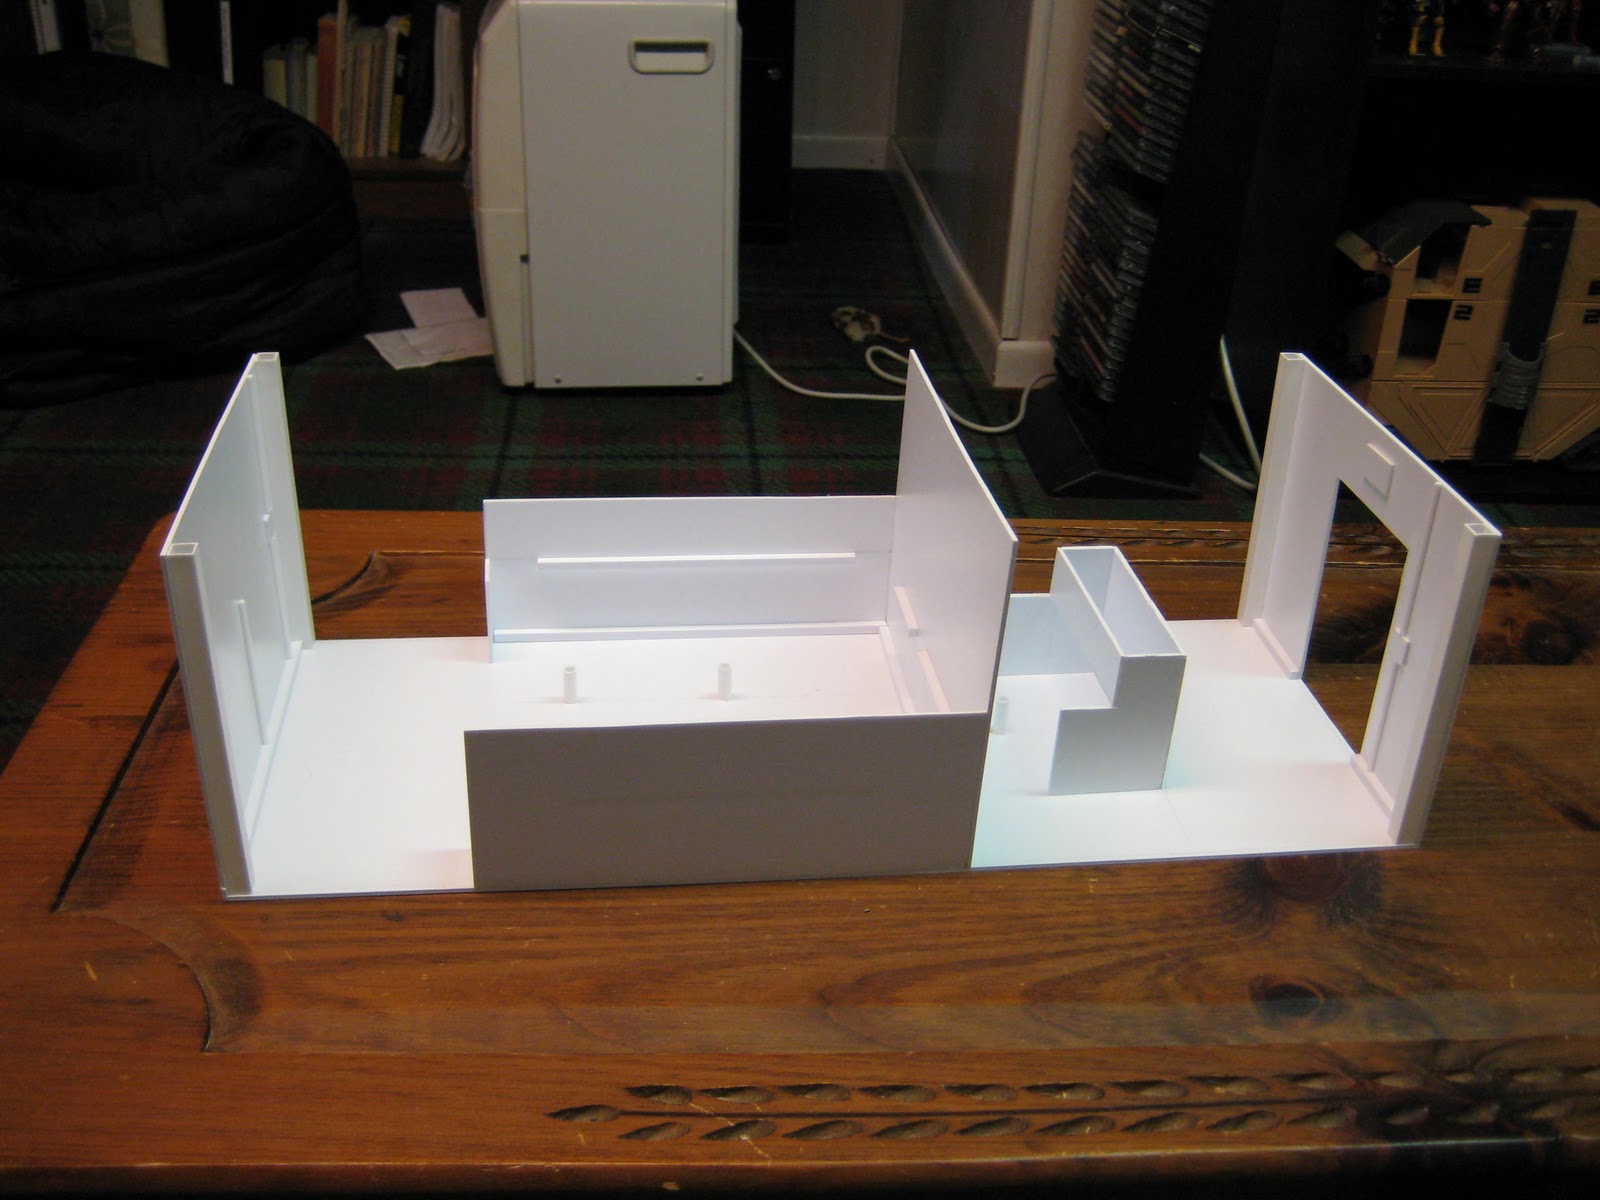
It took a while to get this far, but was surprisingly easy to build.
As you can see, I pretty much have all the white styrene parts together.  I'm planning on spray painting what I have here with Krylon Satin River Rock color paint, and then putting in the desk and counter tops, which will be made out of black styrene. 

If you haven't had a chance to go look at the plans over at Vexar Designs, what you are looking at are two rooms.  The first is an entrance which will have a desk facing a front door.  The next room will have four chairs and four computers and a tv monitor on the back wall. I may also throw some TV monitors in the common wall facing the computer center- it will depend on how things look at that point.  Right now, the design in 22 inches long by 8 inches wide.  I do plan on building additional spaces after this project is done.  Hallways will go immediately left and right of this section, and a mission briefing room/dojo is planned for one side, and a conference room and General's office is planned for the other side.

Welcome to the HQ.  Made by David
Construction, not in any way affiliated
with Halliburton.
So far, this has been a fantastic project.  It takes patience, but it has not been difficult.  The instructions at Vexar are fantastic.  I figure this section will be able to display 4-8 Joes easily and should look pretty cool when complete.  Like I said before, I do plan on doing a "how to work with styrene" post based on everything I picked up building the HQ thus far. I don't want to get into that topic too much here, but I will say that now that I've spent a few hours scoring, shaping, and adhering the stuff, its easy to use, and much easier to use than when I first started working with it.  When you prepare cuts correctly, it splits into very clean sections on very fine lines.  Pencil shows up well on it, so its easy to mark things down.  Its great for building models and for projects like this, and the stuff a far stronger than foam board.

On the other hand, it does look like the stuff is really bad to breath in, so I've been wearing a face mask that I got from the grocery store.  Its the kind of mask that you see people wearing in epidemic movies.  I'm using it to cut down on the possibility of breathing the dust in when I sand the styrene down. I have a ventilation fan going, and I have been washing my hands every time I get up to do something else after I am done working on my project.  And if the styrene dust is bad, I think the fumes from the "plastruct bondene", the cement used to bond it together, is probably horrible.  It sticks like death and you can taste it even through the mask.  I don't want to know what kind of crap it does to the human body.  It does say that "this product contains a chemical known to the State of California to cause cancer", on the back of the bottle, so that is lovely.  I also read that this stuff can be absorbed through your skin, so I've been really careful about not dumping this junk on me.  But it does get the styrene to stick together is seconds, and cures in 30 minutes, so hey, it could kill me, but it makes the model building go quickly.

Until next time.

David D.

Wednesday, September 28, 2011

Time to Build-A-Headquarters

So the way I see it, the centerpiece of an action figure collection is the playset.  When I was a kid, I had all of my He-Man figures arranged around Castle Greyskull, and Skeletor and his minions arranged around Snake Mountain.  But now I've got this collection of Joes and vehicles, but no playset for them.  I do have a Terrordrome (only missing the gun tips for the lower guns- almost complete!) but the Joes still need a place to call home.  I've been looking around for projects in my ability level, and I found

Vexar Design's Build-A-HQ Tactical Operations Center.

This is what I am going for.  Image Credit: Vexar Design
Holy Effing sweet. Its a playset that looks cool as hell that someone with some inexpensive tools, money for supplies and patience can build themselves.  That's two birds with one stone, the way I see it. I decided to take this project up a few days ago, and so far so good.  I love a lot of things about this project.  Here is a list of them.

1. Its modular, so I can add rooms as I see fit.
2. I get to put it together myself!
When I am done with the first section, I plan on
branching out like Canesfan0245 did.  
Work and Image Credit: Canesfan0245 & JoeCustoms
3. I get to work with new materials and build some skills there.
4. Vexar's website has the designs to build the thing (more or less) step by step.
4. Vexar's design is cool, and they have images on the website that can be used for decals right there.
5. It's a freaking action figure playset that doesn't suck!

Canesfan0245 over at JoeCustoms.com worked from the Vexar design and made several other rooms based on it, and the work looks tight.  This little project looked like the perfect next activity to launch into.  So far I am a few hours in (yes, I did say a few hours.  Cutting the styrene takes a long time at the moment.) but I am making progress.  I picked up all the parts Vexar lists on the website to purchase.  Thankfully, my local hobby shop carries the Evergreen Scale Model brand styrene that Vexar recommends AND Vexar identified by item number exactly what stuff to buy.  This turned what could have been an hour shopping trip into a 10 minute shopping trip, because there are lots and lots and lots of types of styrene made by Evergreen in different dimensions, and many of them are very close in size.

My poor xacto knife!  Thank goodness for my sharpener
(the grey and orange item top right corner).  My sharpener
is the unsung hero of this project so far.
So far I have the four six inch columns cut out, the four five mm corner brackets cut out, and the front and back walls cut out. It took me about 30 minutes cut the five mm corner brackets with my xacto knife, and involves plenty of resharpening during that time.  If anyone has any better ideas about how to cut those bad boys out, please let me know.  I have a saw, but I don't know if a saw is the right tool to use on the styrene square tubing.  I also have the door cut out, and I attached the back wall to the floor. 

I purchased two cans of Krylon Satin River Rock color Fusion For Plastic brand spray paint that I will use to give the white sections a more grey/tan color, because I'm not a huge fan of the blinding white of the naked styrene.  I hope this goes well.  I should probably get a section of styrene and do a trial spray paint run first to make sure the paint adheres to the plastic before I go nuts spraying the entire model itself...  note to self: yeah. Do the practice piece first.  But hopefully that will work.

I can follow directions!  They say line the floor up to a wall
to make sure the back wall section glues at a 90 degree
angle.  So put it up against my wall I did. 
If you look at the instructions on the Vexar Design's website, you will see that I am in the middle of step 7.  I do plan on doing the optional step 8 to create the light switch and conduit because it does not look like it will take much more work and because the results look really nice, and give the project a much more real life, lived in look.  I am really getting ahead of myself here, but the next section that I would like to do will be a mission briefing room/dojo/if there is room/work out room.  If there isn't room for a third room, I will combine the dojo and the workout room into one space.  I plan on having this section just to the right of the section I am working on, running parallel to the tac ops panel.  The mission briefing room will be in front and the dojo will be behind it, and an hallway will run along both rooms running lengthwise along the module.  So that's where I am thus far.  More as this thing continues.

Until next time,

David D.

Saturday, September 24, 2011

First Custom Figs!

As easy as this was to do, they look pretty sweet.
Well, I did it.  I made my first custom figures (using processes that involved altering figures in ways that do not include repainting the figures) today.

Yeah baby.  I'm in it thick now.

Ok ok, its nothing too exciting- one of them was just a head switch, and the other is a head switch with some dremel work.  But I think they turned out pretty well.

I ran over to TRU today while doing some errands to see if the Renegades wave was in yet- I haven't had any luck all week finding the new figures, even though it sounds like there are out in a lot of other parts of the country.  The TRU I visited did not have them, but they did have almost the entire first wave of the 30th anniversary Joe figure line except for Hazard Viper, but that was cool because I already have that wave.  But I got to thinking... man... that Iron Granadier is one cool looking figure.  His head is cool, his armor is cool, his weapons are cool... wouldn't it be awesome to see if I could hollow out his helmet and put a Joe head under there so they could run around in an Iron Granadier disguise?

Sgt. Stalker was there too, and I gotta say, this guy has one of the best head sculpts going.  He just looks badass.  I knew that something would have to happen with his hair to get the idea to work- I'd probably have to use my xacto knife to remove it, but what they hey.  So I picked up two Iron Granadiers and one Stalker.  I had a Rise of Cobra Duke sitting in a box of figures I had picked up at TJ Maxx not long ago to be used for parts.  And say what you want about the movie, I really like the head sculpt of that Duke figure too.  I figured I'd try making a Duke in IG costume and a Sgt. Stalker in IG costume, both with removable helmets, and see how it went.  Ideally, both would work out, and if I screwed up with one helmet, I'd still have the one more to work with.

Here they are: after the win but before the fall.
Ok- I got home and got the packages open.  Bad news. There is no way I was going to be able to get the IG helmet over the Duke or Stalker's melon. I had noticed that it would be tough to get Stalker's beret in there back at the store, but once I had the figures out and the heads popped off, it was pretty clear that even though the helmet looks huge on the figure, it is almost exactly the same size as the heads for Stalker or Duke.  Just hollowing the helmet out was not going to work. Time for a new plan.

Yo Joe!
And one came.  When I popped Duke's head on the IG figure, it looked pretty sweet.  Really.  The details in the armor and the details in the head worked well together.  The color pallets were completely compatible.  Even without a removable helmet, this was a pretty cool looking figure.  It would look even cooler with the helmet, but that would take some work. I'd need to make the helmet longer- perhaps that would mean hollowing the thing out, then cutting it into a front and back half and adding some apoxy or whatever to lengthen the thing.  And that would take a bit of work, not to mention supplies and expertise that I didn't have at the moment.  I was looking for a simple win with this project.  My first first custom figure was a situation where I bit off a bit more than I could chew, and I didn't want to repeat that adventure.  I'll be honest- this was a confidence building exercise.  I wanted it to work out, I wanted something that looked cool, but I also wanted to do something that was within my competency level.

I may be an E5 and Duke
an O4, but he WISHES
he looked this good.

When I put Sgt. Stalker's head on the peg to get an idea of how it would look, I was impressed.  Again, the detail of the head worked well with the detail of the rest of the figure, and again, the color pallets were complimentary.  Sgt. Stalker has a much more hardcore look than ROC Duke, and if I could get this to work, I thought this would look like the much nicer figure.  I could not put the head all the way down on the peg however, because the back of the collar of the Iron Granadier was in the way of Stalker's dreadlocks. It would have to go, and perhaps, the handle on the back of the armor would need to go as well, since Stalker's dreads fall down along his back.

Mini Sanding Tool is a go!
I purchased a Black & Decker Dremel from Target a few weeks ago knowing that if I kept things up with this little hobby of mine, I was going to need one sooner or later.  I also grabbed some additional dremel bits because the actual kit came with very few on its own.  I threw the 'light' sanding tool into the dremel and figured there was a first time for everything. I really hoped I wouldn't destroy the figure.   But I had a plan- I would start using the tool on the "low" setting and go as slow as possible.  Kind of like starting a drilling project with the smallest bit; you can't blow it too bad if your bit is smaller than the screw you want to put in the wall (or whatever.) Same deal here.  If I needed more umph, I could always dial it up. 

If you don't like it put a black dot on it.
I also checked out the part of the collar where it seemed to intersect with Sgt. Stalker's hair and marked it with a black felt tip art marker. I figured I could use that to tell where I should be focusing my sanding work and give me a visual.  Being the safe guy that I am, I also threw on some plastic goggles.  It would turn out I didn't really need them, but this was my first run and I wasn't about to risk my eyes on a project.   I also took the armor off the figure itself, as I figured I could damage the body in some way if I kept it on there, and didn't want to risk that.

Dremel work in progress.
 And then I just jumped in with that dremel.   The goings were slow.  The kind of plastic the armor is made out of just did not give much on the low setting.  So I pulled the tool away from the figure and decided, 'here goes nothing', and set the speed adjustment to 'middle'.  And then it was a whole new ballgame.

The dremel tore threw the plastic like a smart phone enabled scalper threw a fully stocked toy store. I used short, brief motions to dremel small portions of the plastic away because I figured that if I held the dremel on the plastic for more than a few fractions of a second, it would slash right threw it.  After some progress, I would put the armor back on the figure, and then try Sgt. Stalker's head on the thing, to see how it lined up and where I needed to do additional work.

All in all, it worked out really well.  I got the collar chiseled out just right so the hair passed through it where the hair is bound up, and even better, the way the dreadlocks spread out covered the gap int he collar.  I also did some dremel work on the handle-looking section of armor that stands out from the back of the figure below the collar line so the hear could rest closer to the back of the figure. Again, I would dremel a bit, then test with the Stalker's head to see where more dremeling was needed, and after a few iterations had a nice set up.  Stalker can't really turn his head too successfully in this set up, but he looks pretty cool standing and looking straight ahead.

And that's it!  Both Stalker and Duke look great in their new Iron Granadier customs.  It didn't take much work to do, but I'm calling this a win on account of the fact it was an original idea that I came up with and it ended up looking sweet, and because I was able to accomplish what I set out to do, and because I got some experience with the dremel and didn't destroy any action figures to the point that I couldn't create what I set out to create with the items I had when I started the project.  So- success!  Woo!

Until next time.

David D.

Monday, September 5, 2011

Spray Nozzle Surprise!

Yes!
I have to say this for fail:  its good that we have it.  If it wasn't for fail, we'd never try new things.  We'd do everything the same we we did it the first time, because why change what works?  Without fail, there would be no pride in achievement. .  There would be no savoring of accomplishment.  If we didn't have fail, how would we laugh at ourselves?

Because if you can't laugh at yourself, you are missing out on one of life's best comedies.  Today's fail tale: David's spray nozzle fiasco.

When I first worked on the Coyote a few months back, I used Krylon spray paint.  When the paint came out of the can, it really splattered all over the place.  I didn't know if it was the temperature, (it had been in the 90's,) or my technique, or maybe that's just how spray paint worked, and in the few cases where I had used spray paint in the past, I hadn't really noticed.  Maybe I was just anxious because I wanted the project to turn out well, and really, it was was fine and that's the way its suppose to be.

Uh-huh.

No!
Well, I was at Walmart today to pick up some spray on primer.  I was in the paint aisle, and I was looking at the different colors of primer- I found some white and gray and black and red brown ("burnt sienna") and I was reading the cans to see how long it took to try and how long it took before the objects I was painting were safe to handle.  And I noticed a little diagram on one of the containers.

According to the diagram, on the nozzle of this particular spray paint can is a removeable, little plastic plug.  It is set into the opening where the paint rushes out of the spray can.  It is actually suppose to be there, and in the diagram, I was shown how it is suppose to be used to control the flow of the paint.  You can twist it up and down to get a more vertical spray, twist it to the side to get a more horizontal spray, or diagonal to get a horiz-tical spray.   

In my first project, I assumed that the little plug was a cap meant to make sure the paint doesn't get out of the can during transit, or something, and pulled the thing out.

SMOOTH MOVE, EX-LAX.

The hero of the hour!
Way to check those directions.  (To be fair, not all of the cans of paint have the diagram showing how to twist the nozzle on them).  When I got home and tried the spray primer without pulling the little tip off, check it out, the spray was very easy to control and not spotty or splattery AT ALL.

So I figured something out!  Don't pull out that little cap from the spray paint, because it is suppose to be there, and because it makes your paint application work much better!

So from the initial fail came renewed interest in how to do things right, which led to me investigate painting further, which led to me figuring out NOT to take out the plug, which lead to

LEARNING

and now, satisfaction that I got the thing right.

Because in the end, what we are really about in our hobbies is satisfaction, right?  Well, if it wasn't for fail, if it wasn't for the fact I was not satisfied with how the spray job went before, I would not feel the satisfaction I feel right now.  So, thanks Fail.  I think.

Next time: David discovers amazing cheap action figures to use for practicing his painting and modding techniques!   I need more time for that post, but it'll be good.  I promise.


Until then,


David D.