Showing posts with label painting. Show all posts

Thursday, February 16, 2012

Progress On The Land Raider

I have made some progress on the Land Raider since my last post on it.  Lots to cover.
And this is what it looks like before I even add the weapons.

First of all, this thing is cool as hell.  The photos aren't perfect- getting a camera stand, some decent lighting and whatnot is on my to do list- but even if it doesn't look bad ass in the pictures, it is when you look at it in person.  This thing just kind of grows in aspects and areas of coolness as it is assembled and painted the way a town in the old game SimCity does.  At first, its just look little piece of this, cool little part of that, then it gets bigger, and you're like, hey, I'm cooking now.  And then you do a little more, and its three times cooler than it was before.  And you do a bit more work, and suddenly, its twelve times cooler.  And before you know it, you've spent six hours on the thing and you have an airport and a sports stadium and no crime and 100% fire coverage and the best road and mass transit system going ever and you look down on your little creation and you think, damn... I made that!

Instead of a door, there is a space marine supply
cupboard in the door frame here.  Um... Why don't
they just keep all that stuff inside the Land Raider proper?
Right now, I'm nearly done with the color blocking of the outside. I used a thick brush to get the big sections of things with two layers of ultra marine blue, and need to go in with smaller brushes to get in the nooks and gaps.  I am going to do a separate entry on some stuff I picked up assembling the thing.  I learned a lot in the process, and I'll cover that later.  But for now, here is what I have.

I have the sides built, top on, treads added, and obviously, have the interior done. I built the model so that the doors open so you can see the details I painted in the interior.  I thought I would be half done when I was complete with the interior walls section of the model- everything else looked like it was just big, wide, flat surfaces that would easily be painted.  It was the details that were going to take all the time, and those were all on the inside, right?

Yeah no.

Port side door closed!
I really discounted how much work painting the treads would be.  I'm also not using an air brush to paint the outside, which would probably save me a ton of time.  In any case, I now consider myself about halfway done.  I will need to do detail work on the exterior as well as get the weapons assembled and painted... but we'll see.  I figure I'm probably on hour ten or eleven on this project.  Will I be done at hour twenty or twenty two?  We'll see.  And if so, how cool will it be at that point?

 So what do I have going on here?  Well, first, as I said, I have it set up so the doors open and close. You can build your Land Raider so that all the doors are glued shut, but I knew I was planning on painting the inside details when I started that project, and just had to hope the doors were cool.

Port side door open!  And you can see the computer station
inside the Land Raider itself!
The doors are very, very cool.  The port side doors slide back and forth.  There are blocks to keep them from sliding too far apart and blocks in the middle of their track, both on the top and bottom, that make the doors come together in the center.  It looks cool.  The *really* cool door though, is the main hatch up front.  Again, you can glue it together.  If you don't, there is a little turning lever assembly that connects to the posts that the the front doors are attached to.  The way the assembly works is that as one door is opened, the other door will open as well.  It is *really* cool.

I put some close combat knife bits on the rack inside the
forward hatch.
The Land Raider doors are too small for any space marines to actually stand inside of. You could slide them in horizontally.  And the cool thing about the Land Raider is that it actually looks like it is tall enough for some Space Marines models to fit inside of the thing. Some one who wanted to do a *really* awesome interior could get a few of them standing inside, receiving final orders and assembling their gear.  Or someone could put a little map table inside of a Land Raider, as the cable is completely empty.  It being empty does make it possible to see the details painted on the walls through the doors, however.

You can kind of see the engine wall in the back of the
Land Raider cabin in this shot- hard to get enough
light in there AND get the camera lens in the right place
but I think you get the idea. 
I still need to finish the following steps to complete this project:

  1. Finish the exterior paint blocking.
  2. Paint the door covers
  3. Paint and assemble the weapons
    1. forward chain gun
    2. side guns (I'll be doing the hurricane bolters)- two sets of these. 
    3. top mounted multi melta
  4. Paint and assemble the other bits
    1. portal covers
    2. smoke can launchers
    3. flood light
    4. communications array
    5. etc.
  5. detailing the exterior
    1. paint all the rivets 
    2. clean up detailing
    3. etc.
I am not planning on doing weathering right now.  I want to practice on another model first, and then apply it to this one.  I could do it right, but I don't want to risk screw this up.  So the weathering step is on the to do list.  Like getting better photo resources. 

And that is where I am right now.  I'll write again when there is news to post. 

Until next time,

David D. 

Sunday, February 12, 2012

Learning those paint shades!

My business cards are so useful for so many
things besides their intended purpose. 
So here is a cool little exercise that I engaged in this week.  Prior to painting the engine block, I noticed that three of my paints, Citadel's mithril silver, boltgun metal and chainmail look really, really similar.  In and out of their containers.  So what is the difference between these paints?

The painting guides usually call for painting metal items boltgun first, then highlight in chainmail and then just add a bit of mithril silver on the edges of the chainmail.  But why?  They look so alike.  Sometimes when I paint I can't even tell after the work is done what parts have the highlighting and what don't.  What is my eye looking for?  Is it brightness?  Finish?  Are some of those paints matte, and some more shiny?

So I decided to do a little experiment.  I took one of my small brushes and painted a bit of each paint on the back of one of my business cards.  Since the surface is a solid, uniform color, I figured I should get a good idea of what I am looking at.  And voila!  The difference became quite clear.  Boltgun is by far the darkest color, followed by chainmail, and then mithril, the lightest.  And ding!  It all makes sense.  Layering paint is often all about putting lighter colors on top of darker ones- hense, the older the guides suggest you put down the paint.  I also noticed that each color is about as shiny as the others.  They are metallic paint, so it makes sense that they would all reflect some.

The picture does not quite show this because the light was coming from the right side of the image- making the chainmail reflect more of the light, and hence, looking lighter than it i in general, but you get the idea.

I can (and will) use this technique again on other colors to see exactly what order I want to use them in when I am working on other laying projects.  There are a lot of paint shades that look close to alike both in their containers and on the work piece.  Even when I'm a doing a model more or less paint by number, which is where I was and am just starting to mess around with a little creativity, knowing the 'why????' of the logic behind the instructions I am following is useful for me to become better at my craft.  This is one of those situations where a I can read something in a book, but I don't necessarily get the concept until I play around with it a bit and make it mine.  And that's a useful skill in a lot of different situations.

Until next time,

David D.

Thursday, February 9, 2012

Land Raider, cont'd...

Left side!
Work continues on the Land Raider.  I've probably put another 3 hours in on this guy, bringing my total up to 6 thus far.  I have the two interior side walls more or less complete.  My painting skill isn't going to win me a Golden Demon award anytime soon, but I'm pretty happy with how everything is looking.  Here is what I have going on. 

Here you see the left side.  You can click on the pictures to make them appear much larger, which helps to the smaller specifics.  I apologize in advance for the imperfect focus.

In any case, moving from left to right, here is what I've used for the painting.  All these paints come from the Citadel paint line (I have really sold my soul, or rather, hobby money to these people.  But this path to perdition is paved with pleasure.) I've got boltgun metal on the rack in the front with chain mail highlights, chain mail on the metal bar running top to bottom with mithril silver rivets and highlights.  The conduit and light are boltgun metal with chain mail and mithril highlights.  The red light it blood red beneath red gore.  The compartment door has a tallarn flesh foundation below bleached bone.  The edge around it was washed with badab black to make it stand out. The seats are calthan brown as a foundation with bestial brown on top.  The footlockers (and all of the rivets over the background, which is shadow grey) is spacewolves grey.  The alarm light on the top of the middle column is boring blazing orange over the black primer.  The cross speaker is shining gold washed with ogryn flesh, a brown wash.  The computer screen is black with a scorpion green freehand graphic of a guy and text around him, which is actually my favorite part of this section.  The data jack is boltgun metal with chainmail highlights.  The center of the data jack opening is blood red with red gore on top.  The second set of seats is the same as the first. 

Right side!
The right side is also pretty cool.  From right to left, I've got computer keys painted in dark flesh, (I needed a new color for computer keys and it looked good.  The left and right arrow keys are blazing yellow, and the button between them is boltgun.  The conduit data jacks below them are boltgun metal with mithril silver highlighting.  The metal bar is chainmail with mithril silver rivets and highlighting.  The conduit and metalic box is boltgun with chianmail and mithril highlights.  The compartment door is identical to the one of the other side; tallarn flesh foundation below bleached bone for the skull, and badab black wash on the edge. The seats on this side are the same as the other side.  The alarm light is also orange, and the cross speaker and skull are the mirror the other side.  In the little alter, I've got talaran flesh for a foundation, dwarf flesh and then skull white.  I also free handed some black script to look like a blessing.  On the sides I have two candles with shining gold and mithril silver highlights, and the candles are golden yellow and little flames have been plaints on top in blazing orange.  The rest of the side are identical to the other.

So that's the yield of another 3 hours of work.  And we're up to six hours total on this project.

Until next time,

David D.

Wednesday, February 8, 2012

Starting work on the Land Raider...

Here we go!
 Ok, I've done a total of 27 space marine infantry figures thus far.  That is sanding down mold lines, priming, assembling, gluing, holding while the glue sets, painting, second coat-ing, washing, detailing, and second coat detailing, over two dozen little guys.  And I still have more to do.  But I needed to do something else because I have gotten really, really, REALLY bored worked on little people.  Good thing I had a land raider crusader/redeemer sitting on the shelf waiting to be worked on, because it is exactly the kind of thing I was up for working on.  So I am.  I figure this is going to take me about 20 hours to do, which means it could take me two or three weeks to finish, depending on how busy I am.  I would love to see my complete kick ass looking land raider right now, but its a labor of love, and the more time I spend on it during painting and construction, the more I'm going to get out of it when its finished.  And here on the blog I'll document the progress of the project.

Ok.  The Land Raider Crusader/Redeemer is one of the biggest models there is in Warhammer 40K, and possibly the biggest model for the entire space marines army.  It clocks in at 124 parts- the Storm Raven Gunship for the Blood Angle Space Marine faction, which is probably the vehicle closest in size to the land raider, has 116 pieces.  In game play, the Land Raider Crusader gives me 12 Strength 4, armor penetration 5, twin linked (meaning you get to roll twice to hit) shots from the side mounted storm bolters that shoot 24 inches.  The top mounted assault cannon gives me a 4 strength 6, armor penetration 4, twin linked shots.  It can carry 16 infantry figures who can assault on the same turn the disembark.  It has armor of 14 all the way around.  Right out of the box, before you add any additional weapons such a multimelta to kill other vehicles, this thing is fast moving, enemy infantry shredding, moving fortress bar none.  I plan on throwing my terminators inside and just demolishing the armies of my foes.  Hordes of cheap orks or necrons?  Bring 'em on.  But first I need to build the thing.

Its gonna take me a while to get this all put together.
As I said, this thing has a *ton* of pieces.  Here are the sprues untouched, just out of the box.

Yeah.  That's almost as many items as were in the entire Assault on Black Reach Warhammer 40K starter kit.  I love seeing all these pieces though.  It reminds me of when I was a kid and got the Lego Blacktron Message Intercept Base for my 9th birthday.  There were sooooo many little bags of lego pieces to put together.  That thing was HUGE.  I remember that it took me 5 hours to put it together.  I *loved* that toy.

Well, as my mother always said, "the bigger the boy, the bigger the toy."

This thing isn't going to be done in 5 hours.

First step, wash off the sprues.  Its a pretty standard step.   I want to get all of the oils and whatnot off of the plastic before I start going to work on it.  I want the primer and paint and glue to go on without any problems, and I don't want any little bumps or ridges screwing up the pieces or the fittings between them. Little soap, little water, little kitchen sponge action, little drying off, we done.  There were a few parts with little crevices where water had beaded up and I couldn't reach it with a towel, so I let the sprues air dry for about an hour before I applied the spray on primer.

I've done enough blogging about my priming and I think you all get the picture.  It took me a while to prime everything, flip it over, and prime it again, and let it all dry.  There are six separate sprues in the package, and my spray paint box was only big enough to spray two at a time, so I would spay them out, wait ten minutes, flip the two I was working on over, do them again, wait ten minutes, take the finished ones off and put the new ones on, and repeat.

A detailed section of the inside of the Land Raider.
Based on my work on my rhino space marine transport, I have decided to work on several pieces of this project while they are still on the sprue instead of cutting everything out and working on them seperately.  I decided to do this for a few reasons.  First of all, it makes it much harder to misplace any of the pieces.  With 124 parts, and some of them very small, its easy for something, such as the instructions, a painting book, the paper towel I use to clean of my brushes, etc, to cover up a piece, which results in my wasting time looking for something, and its kind of a buzz kill.  Second of all, keeping the pieces on the sprue makes it very easy for me to paint the pieces and move the 'em around to get the bast light and painting angle without ever having to touch the piece itself.  Less smudging is better.  Third, it cuts down on items getting knocked around, scratched or otherwise banged up.  So hey- I'll see how it goes. I know it'll mean that I need to repaint the places where the pieces connect to the sprue after I sand down the connection spots after I clip the pieces out.  I'll have to see if it is worth the hassle.

One last pic before I end this entry.  This picture shows a computer counsel that will also be on the inside of the land raider.  The instructions call for constructing the land raider from the inside out; its pretty much impossible to paint the interior once the the model has been constructed, so I need to work on detailed parts like this now.  The rest of the model, while big, isn't especially detailed, at least not in comparison to the interior of the raider.  I bet at this point I have put in about 3 hours of out and out work, not waiting for something to dry work, on this thing.  And I keep working on it.  I'll have more photos soon.

Until next time,

David D.

Wednesday, January 25, 2012

The first squad thus far


I know, I know...  I'm late with an update and I didn't even have the courtesy to do a "sorry, going to be late" post.  Apologies.  Its end of semester for J Term, and I had two papers due this week.  I've got a ton of pictures of 40k stuff I have been working on between reading passages, taking notes, and putting my papers together, and will get some of those up hopefully this weekend.  In the meantime, here is a picture of what the army that I started painting in the last post looks like at the moment. 

Until next time,

David D.

Monday, January 16, 2012

Enter the Ultramarines. Or, how I learned how to apprecaite brush sizes

You can find us at your local gaming store!  But not at model
shop.  Holy moley, model shop owners take umbrage
at even the question of "do you care 40k minis?"  Or at
least the ones near me do. Learn from our mistakes.
Model shops carry MODELS.  We (despite looking
and seeming a lot like models) are GAMES.  Not
MODELS.  Never make this mistake again.


You know, we just don't get the new Joe action figures up here in Minnesota.  I can see pics and reviews of each new wave of figures on the 'Net a good month or two or more before I ever see any of them in my neck of the woods.  Over the weekend, I did a little run through various Targets, Walmart, and today, even a Toys R Us that was near a place where I had a meeting this morning, and the view everywhere is the same.  Not only do I not see any of the new figures, all I see are piles of the previous wave still sitting on the shelves, holiday toy rush over, probably doomed to be there, like the snow drifts, until the snow thaws in April or may.

That is, if we had any snow in Minnesota this year.

Its kind of freakish- we have had a total of about two or three inches of snow total this winter.  Usually, we'd have about five or six inches on the ground right now, easy.  But hey- I'm not complaining.  Less snow means easier driving and less snow shoveling.

Anyway, the lack of Joe stuff has led my eye to wander, and land it has on the Warhammer 40,000 game franchise.

There is a lot of overlap between 40k and action figure customizing.

1. All 40k figures come unpainted and thus, *require* painting.
2. All 40k figures (and vehicles) come assembled and need to be put together, often with xacto knives, files, rotary tools, clippers, and all the other cool little tools used to customize action figures.
3. Military/fantasy theme going on in both places.
4. Neither hobby is gentle on your wallet.

Yeah.  Anyway, my wife's cousin, his wife, his friend, and a few other folks I know play 40k.  I've seen their stuff and it was cool.  I've always wanted to play, and now I've got the funds (although, not really the time) to do it, but what can I say?  Fools rush in.

My spray paint station in my heated and ventilated porch
full of space marine parts getting their primer coat.
I did my first batch of painting these guys last week.  All I got done was the priming step and the first color blocking step.  The army I plan on playing (and painting) is called the Ultramarines, and their main color is a dark blue. 

The nice thing about 40k miniatures is that you can really focus on your technique, because the company that makes them, Games Workshop, does a lot of the creative work for you.  You don't have to follow their guidelines, and many people don't, but it is nice just to focus on one thing at a time.  What I learned this week on the painting front is the key to the different brushes.

Using the right tool for the job is obvious, but not always so when you are in the moment.  In the picture at the top of this posting there are 3 distinct types of models- 10 space marine figures, a walker called a dreadnought, and parts of a transport vehicle that, when assembled, will be called a rhino.  I was painting the largest sections of the figures this week, and thus, didn't need the tiniest brush I had, although when I started painting, that was exactly the brush I was using.  I have, check this, an 18/0 brush.  (thank you, thank you.) for those of you not in the brush size know, that is a really, really tiny brush.  And I was using it at first to paint my guys.  Needless to say, it was taking me about 15 minutes to paint a single shoulder pad of my guys.

Here is how brush sizes work.  Big brushes have high numbers.  Like 10 or 15. Small brushes have little numbers.  Like 1 or 2.  Really small brushes have 0 numbers.  Like 0, 00, 000, and 5/0.  5/0 would be the same as 00000, but its easier to print "5/0" on a brush then all those zeros.  10/0 brushes are meant for fine detail work like one would do on minis like these, such as work on painting eyes, mouths, etc.  I looked at my brush and thought, 'man, there must be a better way'.  So I worked my way up the brush sizes.

I ended up painting the shoulder pads and most of the other "large" surfaces of the figures with a size 2 brush.  2!  It was about 10 times the size of the 18/0 brush.  I didn't have any problems getting paint anywhere I didn't want it, and it saved a TON of time on going back and forth between my paint tray and the minis as I used up the paint on my brush.  I used a 5 brush to paint my rhino.

I also learned that those tiny jars of Citadel paint that Games Workshop sells for its models actually goes a long, long way.  I did one coat of paint on each of my 10 minis and dreadnought, and two coats of paint on the rhino, and I still have paint left.  You can water the paint down and it makes it go even longer, but going by the advice of my wife's cousin, Abe, who is an artist and a graphic designer, I found out you don't really need to water down the paint that much.  Games Workshop does a really nice job of formulating the stuff so it has a good amount of coverage, coating, and control right out of the bottle. So that's pretty nice.

Next up for the space marines is detail work for the minis and some washes for the rhino and the dreadnought.  I have printed out the digital camo stencils I am going to use for the clipper project, and hopefully, will have something to show you there in the next week or so.

Until next time,

David D.

Monday, January 2, 2012

First Custom Action Figure Complete

New Year is a time for many things.  Resolutions.  Hangovers.  Actually getting some snow in Minnesota for the first time this winter.  And new beginnings.  Which means its time to be done with the First Custom Action Figure Project.

Applying the clear coat.
As I write this paragraph, I am waiting for the sealant to dry on the figure so I can reassemble it.  While I wait, I'll reflect on what I did well and what I didn't do so well in this project.

What I did well.

1. Got a clue.  I wanted to do some custom painting, but I didn't know jack about how to actually paint.  I read some forums, watched some youtube videos, and found several great tutorials, but the problem with that was that most of them assumed the reader/viewer had at least some background with painting.  I didn't, so I bought some books aimed at beginners.  This was a good move.

2. Fully disassembled the figure before I began painting it.  Yes, it took time and was irritating, but it made painting everything much, much, easier.

3. Rotary Tool down the rub zones.  Again, this took time, but I think it was the right way to go, if all of the folks on the internet who know what they are doing are to be trusted.

4. Priming the figure.  Some people do not prime their work pieces before they paint.  Those people are taking the quick and easy way.  That is the path to the Dark Side.  If want are taking the time to actually customize a toy, take the time to do it right.  Primer makes the paint adhere to the object being painted.  I don't know about the rest of you, but I expect my customs to be family heirlooms that David Draper XXXVCII  hands down to his children.  That means I want them to last.  That means I prime my damn figures.

5. Come up with a color scheme before hand.  This was a very good idea.  I knew what I wanted.  That made it possible for me to not second guess myself when I was painting, which was good, because at my beginner level of painting I need to be able to concentrate completely on the actual painting, not on doubts I have about the choice of paint.

What I didn't do well.

1. I didn't know my paints.  Just because something looks one way in the bottle does not mean its going that way when it is applied to a surface.  That's a grade school mistake.  I ended up making swatches of all my paints, but I should have done this before I started.  It won't happen again.

2. I painted myself into a corner.  By painting details like eyes and ammo onto my figure, I made it impossible to paint a wash onto the figure without screwing that stuff up.  Washes are watered down mixtures of dark paint that fall into the recesses of a model and give the illusion of shadows and depth.  I could repaint, but eh.  Now I know the correct order to paint a model (once it is primed) is:

  1. Apply the base coats.
  2. Apply wash.
  3. Apply details. 
I won't screw that one up next time.

3. I didn't layer my paint.  When I started the project, I incorrectly thought the idea was to paint dark colors onto the object first, then lighter colors because the darker colors would show throw the lighter ones.  Yeah.  Not so much.  Lighter colors are painted on top of darker ones so the lower, more recessed areas of a model look darker, which, like the washes, helps give a sense of depth and and shadow.  I get that now.  I didn't when I started this project.

Ok- I think the clear coat should be dry now.  I'm going to go get everything from the porch and try to reassemble the figure.  Through the magic of blogging, you won't even notice the gap of time between when you read this paragraph and the next, even though the next will will be written minutes to half an hour after this one!

...

PEG!  GET INTO THAT SOCKET!!!!
Ok.  This is the project that will not die.

All I had to do was reassemble the figure, right?  How hard could that be?

Ha ha ha!  Funny!  Ha ha ha!

These are the joys of doing something for the first time.  Surprisingly long and rather frustrating story short: the little pegs that go in the joints did not want to go back into the joints.  At all.  No matter how hard I pushed, they only went in about half way.  So I had to come up with a plan.  Here is what I did.

Fire it up! Fire it up! Fire it up!
1. Use a hair dryer to heat up the joints and make the plastic nice and flexible.
2. Insert peg.
3. Use my little desk vice with rubber grabbers to CRUSH THE *&^% JOINTS back together.

And this worked great, except for one thing.

THE *&^%^$^%#$ &$^%$#%^_)(*(*$&# vice rubbed the paint right off the pegs!!!!!

So some touch up work was needed.

I THOUGHT I WAS DONE WITH THE PAINTING PHASE!

Talhk, you Svine!  Vee haav your friends in Astreeah!!
Yeah. 

Not so much.

In any case, things are back on track now.  As I type this, the second coat of paint is drying on the ends of the pegs viable from within each joint.  I am very happy that I had my little desk vice here- without it, I would have never been able to get those pegs back into their sockets. If and when this phase of the project is complete, my little desk vice is getting the MVP for this inning of play.

I really was not ready for the pegs to not pretty much slide right back into the joints. Sure, I figured I would need to heat the joints up again, but I thought that they would be soft enough for the peg to fit back in, but it became pretty clear pretty fast that this method was not going to work.  Thank goodness for the vice.  Too bad the paint came off.

Enough stalling... I think the paint should be dry at this point (my paint dries in about 20 minutes, and I only needed a bit, so it should be good now.)  Be right back.

...

Ladies and gentlemen.  It is with great pleasure that I introduce to you, the NEW and IMPROVED Kinji "Rain" Shinto, of The Corps.  First a quick run back down memory lane- here is what he looked like fresh out of the package:

From the front.

From the back.


And here is what he looks like now!

Woo hoo!

Yee ha!!

Alright!!!

WE DONE!

I'm really happy with how this turned out.  I learned a lot of stuff from this project that I will be able to apply to future work.  And it ended up looking pretty good.  I'm pretty stoked right now.

Yeah baby!

This is a good time to mention I could have never finished this project without the support of many people, including most of all my wife, who was nothing but supportive of me spending so much of my free time here in my workshop putting this together.  I would also like to thank Mystic, Numbers, and all the rest of the folks who had supportive comments and advice here on the blog and in the threads on HissTank.com.

I had a great time with this project, but I am also glad to move on to the next one.  It is going to be a vehicle.  Alpha class.  I think you know what project I am talking about.  If not, tune in next week at the latest to see.

Until next time,

David D.

Tuesday, December 27, 2011

Head Shot

The figure is looking pretty good.
I was not looking forward to painting the head of this action figure.  The way I saw it, heads means details.  Details like eyes and eyebrows and irises and hairlines and all that good stuff that you need pretty good technique to handle.  And until a few hours ago, I didn't really think I had the skill to do any of that stuff.

The good news is, I should have had more faith.

But I didn't know that when I started out this evening, so I avoided work on the face by doing touch up work on all the other parts- used the tiny brushes to really get the lines down on the rest of the pieces to get my ready to work on the head.  When everything else looked pretty good (and there was really nothing else left to do... at all...) I decided it was time to attack that face. 

Hair is Folk Art 479 Pure Black by Plaid.
Skin in Elf Flesh by Citadel.
The first thing I did was give the face two good thin coats of Elf Flesh paint, from Citadel.  It was recommended to me by Mythic on Hisstank.com when I asked if anyone had any suggestions for skin tones to use for Japanese characters.  Mythic is an *amazing* customs artist and I think the advice turned out well.  The skin tone was great for what I was looking for.  Painting the skin and carefully edging between the hair and the skin wasn't too bad.  That mean it was time to work... on the eyes.

Time to man up and get to it.

Eyes over painted!
I had read a really good post on painting eyes somewhere that I can no longer remember* [update: I found the reference.  This is discussed on page 35 of the free MiniWarGaming ebook that I discussed here. - Dave] that recommended over-painting details on the face such as lips and eyes, and then covering the excess up with the skin tone again.  That seemed like an easier approach than just trying to get the eyes painted just right, so I completely over-painted the eye area with white paint using my two smallest brushes.  I used a second new technique here as well; instead of using short, smooth brush strokes over the eye area, I just tapped the area with the very tip of the brush almost like I was tapping in Morse Code.  I used just a dab of white on the brush in order to paint from landing anywhere I did not want it to go.  Using this 'tapping' technique was really nice, because it made hitting spots I wanted to hit easy, and made putting the paint where I wanted it much easier than it would have been if I just wiped the paint on with my normal brushing technique.

Eyes cleaned up.
 Next I went over the edges of the white that had spilled over the actual eyes themselves with the skin tone again.  And again, I used the 'tapping' technique to put the brush exactly where I wanted it. It worked great, and in very little time, I had two pretty well shaped eyes.  I liked how things were going; the eyes, which I thought were going to be a pain, were going well.  It had a lot to do with the techniques I had picked up from watching plenty of you tube 'how to' videos and advice I received from folks online, but I should give myself a little credit too.  Even with the advice, I didn't think I would be able to hold my brush steady enough to paint the face, but it was actually much easier to accomplish than I thought it would be.  Next would be the real challenge though- painting the irises.
The face is looking not too horrible.

I tried using the 'tap' technique to get the dark spots in the middle of the eyes a few times, but I just was not getting enough paint exactly where I wanted it to make much of a mark on the eyes using my paint brushes.  The dots were very, very light.  Over the white eye paint, they looked like faint grey spots that practically blended in with the rest of the eye I didn't want to tap the brush too hard, because I thought it would end up making a black spot on the face which would undo everything I had just accomplished.  But then I got an idea- how about putting paint on the end of an unbent paper clip?  I grabbed a paperclip out of my desk, pulled it straight, and popped it into the paint.

Guess what?

Paper clips make excellent iris painting tools.

Hobby tool of the day: the light up magnifier.
For the rest of the face, I ended up using a tool I picked up at a hobby shot a few months ago but had not used until today.  It was a folding 2x magnifier with built in LED lights, and made painting the eyebrows and soul patch a breeze.   Again, I used the tapping method, which took a lot longer to do on the eyebrows that I thought it would, but minimal touch up was required. And hey, whatever works.

So where I am now is this figure is pretty close to done.  I want to get some rest and take a look at it tomorrow to see what touching up may need to be done, and then I need to reassemble the figure.  But for my first try, I think this thing looks great.   Sure it could be better- I could have come up with some additional colors for the face and done some layering.  I may also do a dark wash to add some shadows, but I'm not sure.  I'm so happy with how things look at the moment I think I may decide to quit while I'm ahead and try those techniques on the next figure painting project.  You'll see what I decide soon.

Until next time,

David D.

Sunday, December 25, 2011

Unplanned Christmas Update

I was not expecting to have an update today, but I found something I had to write up.  On my quest to become a better painter, I've been doing a lot of research on the internet.  I've done a lot of lurking and and a bit of posting, and this morning, I found miniwargaming.com.  Its an amazing store/forum/youtube video producer/community that all about crafting.  There are plenty of amazing things going on at this site, but the one I'm going to discuss in this short update is the FREE FREE FREE ebook they give you about painting minis (or anything, really) you get when you sign up for their forum.

Fifty nine pages of amazing painting related
descriptions, techniques and advice.
For FREE.
Free.  For signing up for their online forum.

But how good could a free PDF be?  Let me put it this way.  If you follow this site closely, you know that for the last two or three months I have been spending lots of time finding the best hobby painting sites, books and guides on the web and off.  And there are some really, really good guides, books, and forums out there.  There are plenty of helpful people on the net.  But in terms of a one stop manual for painting mini figures or action figures, this one

IS THE BEST I'VE SEEN.

Its even better than the Games Workshop guides for painting figures, and that thing was 25 bucks.  And unlike the games workshop book (which is very good) this guide does not push one paints and other products from one specific manufacturer.

That's how good.  Its 59 pages long.  Full color illustrations.  Fantastic writing.  It is written by hobby painters for hobby painters.  This guide could be, nay, should be, something people pay something for to pick up.  Its an amazing guide.  And all you need to do to get a copy is sign up for their forum.

I need to get back to the family, but I wanted to put this up there.  Happy holidays, folks.

Until next time,

David D.

Monday, December 19, 2011

Know your paints

Ok- I'm back from the conference in DC, which was very cool, and am at my painting desk.  I made a pretty big mistake last week in assuming what my paints would look like out of the bottle.  I had planned on painting the armor, gloves and boots of my figure a gray, and the rest of the figure black.  My black paint looked fine, but my highlight shade of gray paint looked like chalk; it was way, way lighter than I had expected.  Back to the drawing board.

You landed on boardwalk, sucker!
This was one of those times that educators call a "teachable moment".  I should have had an idea of what my gray paint was going to look like.  I figured I could make swatches of each of my colors, and made swatches today I did.  I painted a bit of each color on the backs of old business cards.  I also threw the name of the color, the manufacturer, and the product ID on the card to make I can easily buy more when I'm out.  They came out looking like deeds from a Monopoly game, but they serve their purpose.

Another thing that I had not thought of but should have is the finish of each paint- besides the colors themselves, a few of my paints have a very glossy finish, and the rest are pretty matte.  I figure knowing what is what on the finish front is also pretty useful. Figuring this out is an unintended benefit of the project.  Yay for unexpected results!

Now that I know what colors I have, there is a dilemma: I could paint medium gray over the old steel gray paint, not knowing how that is going to turn out, or I remove all of the paint and start again from scratch.  If I start again from scratch, I'm going to need a good way to remove the paint.  I know there are ways to do this, but the methods I know involve buying more supplies, and I'd rather accept that this is a first try and that it isn't going to be perfect.

So- time to get back to actually painting the figure.  More soon.

Until next time,

David D.

Monday, December 12, 2011

Figure Painting, Part 1

I found myself with some extra time this evening (now yesterday evening) after getting home from a family holiday party, so I decided I would get to it and start painting.  I wasn't expecting to have time to do get started with the actual paint step until at least next week, so this was a pleasant surprise. I've been both looking forward to this and dreading it for a while; it is time to just get started.

black coat over black primer, white dry brushed, and
now a few layers of medium gray paint over everything else.
I began by putting a black base coat over the black primer I previous applied.  That step was no problem.  I then did some dry brushing of white paint onto different surfaces, because I understand that painting over lighter colors can impact the intensity of the paint that over over it.  It was my first time dry brushing, and I think it turned out alright. 

I wish I had taken more pictures of everything as I was doing it, but I was too engrossed in the act of painting to step back and stop to take pictures of each phase.  Next time.

After I got done with the dry brushing, I moved on to painting a darker gray onto the areas of the figure that I meant to end up gray- the body armor, gloves, boots, pockets, etc.  That went pretty well.  I am using Folk Art acrylic paints  from Plaid.  I use their paint because it comes in a ton of colors, its super inexpensive ($0.79 per 2 ounce bottle) and it seems to be good quality stuff.

One principle I saw in practice while painting the gray was color vs. coverage.  This idea is covered on page 50 of How To Paint Citadel Miniatures, and the idea is this: when it comes to paint, there is a trade off between the brightness of colors and their capacity to cover a surface in a single coat.  Some paint is made to cover objects in one or two coats.  In this case, the colors tend to be dull.  On the other hand, paints can be formulated to have bright colors, but in order to achieve these colors, several coats may need to be applied, as each individual coat is relatively translucent.  The former type of paint was the factor with the gray. After two coats, it didn't look very impressive, but after four, it looked amazing. 

on the left we have the medium gray, and on the right
we have steel gray on top of the medium gray.
Steel gray is kind of like barely dirty mob bucket water gray.
However, I do fine myself stuck at the moment.  I thought that I would use a darker color gray (medium gray) to be the first color layer of the armor, and then I would move to lighter colors of gray to give the sense of definition, shadow and high lighting to the figure.  Everything was great until I added the next layer of gray, which was steel gray.  On figure, the steel gray looks almost white.  The pictures here don't really do it justice; I need to learn how to white balance my photos before I upload them, but that's something for me to learn on another day.

The darker gray does give the illusion of shadows in the folds and recesses of the shape, but the really light color of the gray doesn't look good at all; it really isn't what I want. I'm not sure at this point what to try next. Maybe I should repaint the parts where I used the steel gray on with the medium gray, and try to find a gray paint that is closer to medium gray in darkness but still a little bit lighter than the medium gray.

I am looking at the Plaid colors online as I write this, and it looks like there several grays in the spectrum I could purchase, and the steel gray swatch on the website looks much whiter than the bottle I have here.  That makes sense.  I think my next step will be to run to the store when I can and grabbing battleship gray and dark gray, and doing some experimenting with dark gray, battleship gray and medium gray.  Based on how those look, I'll make a choice about what paints I want to use going forward.

Ok- so that's the plan.  Find those other colors at the store and report back to the workshop when I have time.  More news as it happens.

Until next time,

David D.

Sunday, December 4, 2011

Action Figure Painting Project: Everything Prior to Actually Priming


Ok! Well, finals were over this week, and this weekend, I've had a chance to get back to work on my hobby.  How To Pain Citadel Miniatures says that you can go with either a black or white primer. According to the book, black is good for making the painting process go faster, while while is good for master painters and makes bright colors show better.  The black makes shadows look better.

I went with a black primer base primer. I could be wrong, but I think it'll be easier to get the shadow effects I would like on the finished product if I start with the black, instead of painting it white, than doing a dark second coat and THEN painting the real colors I want on top of that dark coat on top of the primer.  According to the book, I can also get a good shadow effect using dark washes over the final layer of color, but I am trying to keep this first figure relatively simple.   I'm ruling out washes for this project.

But I'm getting ahead of myself.  Lets step back.

Before you can put on the primer, you need to disassemble the figure into its component pieces.

Check.

Next you need to sand down potential rub spots so that once you put your paint on the figure, the paint won't run itself off.

Done.

Note.  According to the book I should have also performed a check of all the mold seams on the figure pieces.  If I found anything that I could detect by running a fingernail over it, I needed to sand it down.  I did not actually end up doing this step thoroughly, and yes, after I sprayed on my first layer of primer, I did notice several huge plastic seams.

Agh!

Oh well.  But what I want to get to is the painting phase.  Looking forward to actually painting has been what has got me thought all the pages and pages of papers I have had to write for my finals last week.  Its my first figure that I'll be painting since getting a clue as to how to do it.  I'll let the seam thing slide.
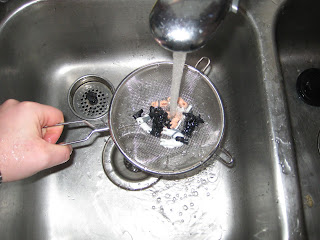
The clean water burns!  It BURNS!
After you check for seams (should you decide to check for seams) you need to wash your prices off to get rid of any oil or other substances on them that could keep the primer from adhering smoothly

Ah-ha!

Best get cracking on that one!

So I did.  With the use of standard hand colander, I got the figures good and rinsed in the kitchen sink.  I didn't want to risk the joint pegs getting lost down the drain, so I didn't bounce the pieces up and down in the water- I just smoothly moved them around under the water to get everything nice and soaked.  I couldn't see any residue on the pieces to begin with, so I wasn't worried about very aggressive washing.  Next I put the pieces on a towel to dry on the porch.  We have a door between the porch and the rest of the house, so I didn't need to worry about our two cats, Boots and Dora, getting to the pieces, deciding to knock them around as they do everything that isn't bolted down, and making sure my dream project ends up a nightmare.
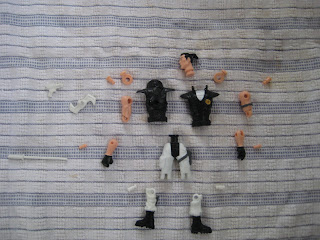
So close to the painting step I can barely stand it.
I should talk about the spray painting situation a little bit here.  Right now, it is winter in St. Paul, Minnesota, where I live.  It is about 29 degrees Fahrenheit outside (about -2 for everyone else in the world that goes by Celsius).  We have 4 inches of snow on the ground.

According to the spray paint instructions, you need to paint in a place that is well ventilated and where the temperature is at least 50 degrees Fahrenheit/10 degrees Celsius.

What I did over the summer is spray paint stuff out in the garage, where there was plenty of fresh air and air flow when I had the doors open.  We live in a house built in 1947 or so, and the garage is detached.  Thus, there are no problems with fumes getting into the house.

Now that winter is here, I want to use the porch as my spray paint studio.  Its a good 3 season space.  One of our home's previous owners installed a nice heater there, and there are windows that open to let in the air from outside. My plan was to spay paint the work pieces using the cardboard spay paint enclosure I built for previous projects while I had the heater on, and after 75 minutes or so (the amount of time it takes for the primer to dry) open up the window and get the fumes out.  This seemed to be a great idea until my wife looked at the warning label for the primer.
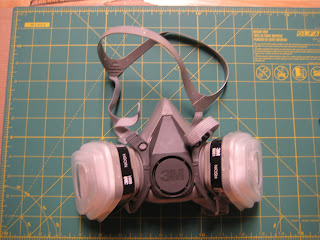
The new mask.
::hooooo-pah:: ::hooooo-pah::
What is thy bidding, my masta?
It turns out, the fumes from this stuff is really, really, really, really, really, really bad for you.  I think I have mentioned on my blog that my wife is a family practice doctor just about done with her final year of residency, and among other things she said after seeing the paint instructions is that she wasn't interested in spending her hard earned dollars after years and years of intense education education on chemo meds for her husband anytime soon.   She *ahem* encouraged me *ahem* to buy a really serious painting mask AND that I do not use the door between the house and the porch, that I go out the back door, walk around to the front of the house and use the front door to the porch there.

Because I am a smart effing husband, I said "Yes Dear" and ran to the hardware shop, where I bought a really, really hard core, professional grade painting mask. I put it on and looked in the mirror. I look like something out of a Hollywood movie with this thing on.  I need to incorporate it into a Halloween costume at some point.  Anyway, I grabbed the mask and sealed the door between the house and the porch.  I turned on the heater to get the porch warm enough to paint the pieces and waited for the porch to warm up.

This cardboard once package a toy.  Soon, it will find a new
use as a platform for items to be painted to be place upon.
Another thing I learned from the book is to not just put the pieces down in your painting enclosure, but to put the work piece(s) on a section of cardboard that you can rotate without touching the pieces themselves.  This may be a 'duh!' suggestion to people with more experience in this area, but this was useful advice for me.  I still had the box from the Bravo Team M3A2 Bradley Fighting Vehicle in a pile of boxes to be put in the recycling, and cut the box into a bunch of cards. 

At this point someone could accuse me of ceding all decision making authority on this project to Rick Priestley, author of How to Paint Citadel Miniatures.  Those people would be right.  I absolutely have.  I am not just my wife's bitch, or as I like to think of it, a smart effing husband, I'm game workshop's bitch as well.  But I am cool with that.  When it comes to painting figures, I want lots and lots of instruction until I know what I am doing.  At that point, I'll start doing my own thing.

The spray enclosure.  Don't spray paint anything without one.
I am not at that point yet.  Sometime soon I am going to write a more in-depth blog post about my feelings on using a book which is absolutely a $30 advertisement for Game Workshop products. I think its a topic worthy of a write up.  But I want to get done with this post first.

In about 10 minutes, the porch heater got the porch warm enough to paint.  I got the paint enclosure set up, put down one of my newly cut cards in the enclosure, and put the pieces on the card. I spray painted two light coats of black primer on the figures, and things look good so far.  Moving the card to adjust the angle at which I could spray the work pieces worked out fantastically.  I took a few pictures, but it is dark at this point and the lighting on the porch is bad, so no pictures of that is going up yet.  I will take some pictures tomorrow and post them then.  I'm happy with how things are going so far.

That's the logical conclusion of this update, so I'll call it quits here.

Until next time,

David Draper

Sunday, November 20, 2011

A new project begins

Brushwork worthy of kindergartners!
It has been a dark time for David's Workshop.  While David did enjoy building the HQ display and painting the coyote, it was clear to David that he had reached the limits of his painting skills, especially in terms painting individual action figures. Despite the fact he researched action figure painting techniques like crazy on the web, he was stuck just not quite getting it.  His figures looked like a mess, and David was frustrated.

Hope seemed lost.  Nothing seemed to be working out the way he wanted it to, and the path to improvement seemed lost.  Buying action figures to practice with was expensive- Joes were $8.00 a pop at least at the local Target and Walmart, and David didn't seem to have the hand control or the sense of what he was doing to justify painting figure after figure after figure with the same cruddy results time and time again.  David was about to throw in the towel.

Spay paint that looked horrible!
But Lo!  In his darkest hour, David walked into the store Air Traffic at the mall during a break in holiday gift purchasing.  Air Traffic is a great store based out of the Twin Cities of St. Paul and Minneapolis that carries games, smart kid toys, kites, disc golf, model rockets and juggling supplies, as well as Warhammer 40K items and Games Workshop painting supplies.  Basically, it is a nerd store camouflaged as toy/game store.

David loves Air Traffic.

Even before he started work on his workshop, he would often walk in and look at the display cases of Warhammer armies with longing and wish he was skilled enough to paint as well as the people who had painted those miniatures, as well as the guts to actually buy miniatures like them and paint 'em.  David was raised by parents who were good, but not very open to their son being interested in nerdy pastimes like RPGs and minitures, so David was forced to enjoy them from afar.  Since his teenage days, he had been especially impressed with the folks who painted miniatures.  The people who did it well had crazy amazing skills.  The creativity to come up with a plan and the ability to execute on that plan, resulting in such such awesome final products made him a fan of anyone who can paint figurines well, regardless of how annoying anyone but their mother finds them or their ratio of years on this planet to the number of sexual experiences they have had with people other then themselves. These people were doing something they enjoyed, and it was something David did not have the guts to try on his own.  He feared the disapproval of his parents, and he feared sucking at it.

By the power of Grayskulll! 
I HAVE THE POWER!!!!!
But times change.  On this day at Air Traffic at the mall, (just last week), David found the book How to Paint Citadel Miniatures on the shelves next to all the other Warhammer 40K guidebooks.  It was a sign.  He picked up the book and flipped through it.  It wasn't just the full color illustrations that caught his eye-it was the step by step instructions on how to paint plastic miniatures in a bunch of different ways.  There were sections of preparation, color theory, blending, techniques to steady one's hands when painting, how to add effects like rust and wear to the painted object, dry brushing, diluting paint, washes, the list just went on and on.  The book was $30, which seemed pretty insane, but he had tried so many times and really wanted to get good at this.  So he bit the bullet and bought the book.

On top of this, his local Walmart sold a line of figures called The Corps, which were only about $1 each when you purchased in 3 packs.  The figures are not as nice as Joes, but they are inexpensive, easy to take apart, identical in size, and nearly identical in complexity of figure and accessories.  Take the guy I have over here.  His name is Kinji "Rain" Shinto and according to his packaging, he is part of the Corps Shinobi Squad specialized ninja assault team.

I am going to be fodder for David's next project!
This brings us to now, and I'll leave more summary third person past tense and switch gears to more intimate first person present tense. 

Ok, save your cracks about western stereotypes about Japan and far eastern culture. David thinks: duly noted.  Especially since Mr. Shinto-San's skin is as white as the peachiest of peachy peaches.  But this figure has potential.  He has nine points of articulation- knees, hips, elbows, shoulder (ball joints) and head.  He has three accessories- a bad ass looking pistol, a ninjaken (aka ninja sword, thank you google). and a totally inaccurate but still cool looking spinny throwing knife looking thing.  All of these items can be carried on Mr. Shinto-San's person.  The figure has a built-in sheath on his back, a holster for the gun on his right shin, and the handle for the spinny throwing knife fits into the hole in his back where the screw that holds the figure together goes.  In addition, the detail in the figure, while not great, isn't horrible.  His boots and chest armor are especially detailed.  He needs a new skin tone, and the copy paper white pants need to go, and his weapons need some paint as well, but I think this guy could be slick.  And now I'm armed with the book and I've got the courage to try a new project.

Alas, time has run short on this weekend, and I don't have time to start work on the project, take the pictures and write an update.  I haven't done an update in a while, so I thought I would take care of that, and then over the next week start work on the project.  When I have some results, I'll post it.  At the moment, here is my plan: 

1. dremel down the the rub points in the shoulders, elbows, hips and knees. 
2. disassemble the figure, including removing the lower legs/arms from the upper legs arms through the use of a hair dryer. 
3. wash all the pieces in water to get grease and whatever else is on them off.
4. spray paint the pieces while for a base coat with plastic friendly spray paint.
5. pick a color theme.  I am thinking either black/green/yellow or silver/blue/black, plus a more asian skin tone. 
6. engage that theme with the painting skills I pick up from the book!
7. go slow.
8. have fun.
repeat 6-8 over and over.
9. profit!

We'll see how it all goes.


Until next time,

David D.

Wednesday, October 5, 2011

Desks up and How to Cut Styrene.

So far, so good.  Glad the painting stage is over.
Well, the painting adventure is over.  Cotton balls + mineral spirits got rid of the non plastic paint with no problems at all.  The next coat of paint went on and everything looks great.  ::phew:: that's nice.  I was worried the surfaces were going to look like crap forever.  One problem solved. So that was cool.  After the paint situation was resolved, I went on to add the desks, both in the tac ops center in the back and in the lobby.  The desks themselves are made from black styrene, the same stuff used to make everything else. 

Except this stuff is black, not white. 

I have some little piece work left to do: print out the decals from the website on some sticker project paper, and making the chairs and computers.  That will involve a great deal of cutting styrene sheets but I'm not too worried.  During this project, I have become a master at cutting styrene sheets.  I have wanted to do a 'how to cut styrene for beginners' tutorial for a while, and I may as well do one now since I have some time and I'm on the subject.  Here we go.

How to Cut Styrene

You will need: 

1. A  sheet of styrene
2. A pencil
3. A ruler/Straight edge
4. An Xacto knife/Razor/cutting blade of some sort.
5. Sandpaper (if you screw up.)

Recommended:
6. A desk/work bench makes things much easier.

1. Use a ruler to measure out the length of styrene you want on one side of the styrene sheet.  Mark point for length you using a pencil with a little dash mark on the styrene. (this works on white and black styrene.)  So if you have an 21x8 sheet of styrene and want a 6x8 panel, go 6 inches up from one end on the 21 inch side and mark a dash at 6 inches.

2. go to the other side of the sheet, and do the same thing.  So now you should have two dashes, both 6 inches away from the end.

3. Now flip the styrene over so the flat surface that was on top is now on bottom.  Do steps 1 and 2 again on the other side. 

4. Repeat steps 1 and 2 again to make sure you measured correctly from the ends (measure twice, cut once isn't a joke, and it will save you time if you screw up.) 

5. After you confirm (or remark) your dash marks with a pencil, use a straight edge, such as your ruler, to draw a line between the two dash marks.

6. Repeat step 3, which is to say, flip the styrene sheet over, double check your measurements.

7. Now repeat step 5 on the other side of the styrene sheet.  Use your straight edge to draw a line with your pencil to connect the two dash marks.

8. Now take out your knife.  You can use an Xacto knife, a razor, whatever.  I also use the straight edge, and score the styrene along the pencil line you just drew.  On one side of the styrene.  You can use the straight edge to guide your knife, making sure the score is straight.  Repeat this at least three times in one direction.

9. Important Note: you do not need to cut all the way through the styrene.  You just need to score it.  I spent a LONG time on the first few cuts of this project because I carved all the way through the styrene with my xacto knife.  I don't recommend it.  Learn from my mistakes!

10.  Now, score the line in the opposite direction at least 3 times.  If you were going right to left the first time (in step 8), now score the styrene from left to right.

11. Flip over the styrene.  There should be an unscored surface with a pencil mark facing up, and the scored surface should be facing down.  Repeat steps 8-10 on the other side.

12. Now you are done with your knife.  To be safe, first put the xacto cover back on your xacto knife or adjust your razor so it slides back into the tool's handle.  Stage 13 is going to be a little violent, and you do not want sharp objects around where sudden motions take place.

13. For best results, place the styrene on a flat surface, such as a desk or work bench, with the scored line right at the edge of the table or desk and the part you want to break off hanging over the table or desk.  Apply steady pressure to the styrene, with one hand on the part you cut to use in your project and one hand holding the part you want to have left over.  You do not have to do this quickly.  The first few times you try this you may not feel exactly how much pressure you need to place on the styrene to get it to break.  The styrene will bend.  Do not worry, it will snap back straight again when the piece breaks off.

14.  Very suddenly, the styrene will snap apart.  If you scored the styrene well, the line will be a very nice flat line.  If it was less well done, you may need to do some minor sanding to make the break line clean.

The key to this entire process is scoring the styrene well.  If you do good straight cuts, the break lines will be pristine.  Yes, you can just do one side of the styrene, but when I have tried going fast, in my experience it does not goes nearly as well.  Score both sides of the sheet.  The lines are much finer and need zero sanding to get what you want. 

Congrats!  You have cut your styrene!

I'll update this post soon with pictures for the styrene cutting steps.  Until then, enjoy the words.

That's all I have for now.  Until next time.

David D.