Sunday, December 4, 2011

Action Figure Painting Project: Everything Prior to Actually Priming


Ok! Well, finals were over this week, and this weekend, I've had a chance to get back to work on my hobby.  How To Pain Citadel Miniatures says that you can go with either a black or white primer. According to the book, black is good for making the painting process go faster, while while is good for master painters and makes bright colors show better.  The black makes shadows look better.

I went with a black primer base primer. I could be wrong, but I think it'll be easier to get the shadow effects I would like on the finished product if I start with the black, instead of painting it white, than doing a dark second coat and THEN painting the real colors I want on top of that dark coat on top of the primer.  According to the book, I can also get a good shadow effect using dark washes over the final layer of color, but I am trying to keep this first figure relatively simple.   I'm ruling out washes for this project.

But I'm getting ahead of myself.  Lets step back.

Before you can put on the primer, you need to disassemble the figure into its component pieces.

Check.

Next you need to sand down potential rub spots so that once you put your paint on the figure, the paint won't run itself off.

Done.

Note.  According to the book I should have also performed a check of all the mold seams on the figure pieces.  If I found anything that I could detect by running a fingernail over it, I needed to sand it down.  I did not actually end up doing this step thoroughly, and yes, after I sprayed on my first layer of primer, I did notice several huge plastic seams.

Agh!

Oh well.  But what I want to get to is the painting phase.  Looking forward to actually painting has been what has got me thought all the pages and pages of papers I have had to write for my finals last week.  Its my first figure that I'll be painting since getting a clue as to how to do it.  I'll let the seam thing slide.

The clean water burns!  It BURNS!
After you check for seams (should you decide to check for seams) you need to wash your prices off to get rid of any oil or other substances on them that could keep the primer from adhering smoothly

Ah-ha!

Best get cracking on that one!

So I did.  With the use of standard hand colander, I got the figures good and rinsed in the kitchen sink.  I didn't want to risk the joint pegs getting lost down the drain, so I didn't bounce the pieces up and down in the water- I just smoothly moved them around under the water to get everything nice and soaked.  I couldn't see any residue on the pieces to begin with, so I wasn't worried about very aggressive washing.  Next I put the pieces on a towel to dry on the porch.  We have a door between the porch and the rest of the house, so I didn't need to worry about our two cats, Boots and Dora, getting to the pieces, deciding to knock them around as they do everything that isn't bolted down, and making sure my dream project ends up a nightmare.

So close to the painting step I can barely stand it.
I should talk about the spray painting situation a little bit here.  Right now, it is winter in St. Paul, Minnesota, where I live.  It is about 29 degrees Fahrenheit outside (about -2 for everyone else in the world that goes by Celsius).  We have 4 inches of snow on the ground.

According to the spray paint instructions, you need to paint in a place that is well ventilated and where the temperature is at least 50 degrees Fahrenheit/10 degrees Celsius.

What I did over the summer is spray paint stuff out in the garage, where there was plenty of fresh air and air flow when I had the doors open.  We live in a house built in 1947 or so, and the garage is detached.  Thus, there are no problems with fumes getting into the house.

Now that winter is here, I want to use the porch as my spray paint studio.  Its a good 3 season space.  One of our home's previous owners installed a nice heater there, and there are windows that open to let in the air from outside. My plan was to spay paint the work pieces using the cardboard spay paint enclosure I built for previous projects while I had the heater on, and after 75 minutes or so (the amount of time it takes for the primer to dry) open up the window and get the fumes out.  This seemed to be a great idea until my wife looked at the warning label for the primer.

The new mask.
::hooooo-pah:: ::hooooo-pah::
What is thy bidding, my masta?
It turns out, the fumes from this stuff is really, really, really, really, really, really bad for you.  I think I have mentioned on my blog that my wife is a family practice doctor just about done with her final year of residency, and among other things she said after seeing the paint instructions is that she wasn't interested in spending her hard earned dollars after years and years of intense education education on chemo meds for her husband anytime soon.   She *ahem* encouraged me *ahem* to buy a really serious painting mask AND that I do not use the door between the house and the porch, that I go out the back door, walk around to the front of the house and use the front door to the porch there.

Because I am a smart effing husband, I said "Yes Dear" and ran to the hardware shop, where I bought a really, really hard core, professional grade painting mask. I put it on and looked in the mirror. I look like something out of a Hollywood movie with this thing on.  I need to incorporate it into a Halloween costume at some point.  Anyway, I grabbed the mask and sealed the door between the house and the porch.  I turned on the heater to get the porch warm enough to paint the pieces and waited for the porch to warm up.

This cardboard once package a toy.  Soon, it will find a new
use as a platform for items to be painted to be place upon.
Another thing I learned from the book is to not just put the pieces down in your painting enclosure, but to put the work piece(s) on a section of cardboard that you can rotate without touching the pieces themselves.  This may be a 'duh!' suggestion to people with more experience in this area, but this was useful advice for me.  I still had the box from the Bravo Team M3A2 Bradley Fighting Vehicle in a pile of boxes to be put in the recycling, and cut the box into a bunch of cards. 

At this point someone could accuse me of ceding all decision making authority on this project to Rick Priestley, author of How to Paint Citadel Miniatures.  Those people would be right.  I absolutely have.  I am not just my wife's bitch, or as I like to think of it, a smart effing husband, I'm game workshop's bitch as well.  But I am cool with that.  When it comes to painting figures, I want lots and lots of instruction until I know what I am doing.  At that point, I'll start doing my own thing.

The spray enclosure.  Don't spray paint anything without one.
I am not at that point yet.  Sometime soon I am going to write a more in-depth blog post about my feelings on using a book which is absolutely a $30 advertisement for Game Workshop products. I think its a topic worthy of a write up.  But I want to get done with this post first.

In about 10 minutes, the porch heater got the porch warm enough to paint.  I got the paint enclosure set up, put down one of my newly cut cards in the enclosure, and put the pieces on the card. I spray painted two light coats of black primer on the figures, and things look good so far.  Moving the card to adjust the angle at which I could spray the work pieces worked out fantastically.  I took a few pictures, but it is dark at this point and the lighting on the porch is bad, so no pictures of that is going up yet.  I will take some pictures tomorrow and post them then.  I'm happy with how things are going so far.

That's the logical conclusion of this update, so I'll call it quits here.

Until next time,

David Draper

Thursday, December 1, 2011

Papercraft Computer Console

My computer space is not as cool as this little set up.
One of the aspects of my job as a child life skills worker is that I am on the phone plenty.  I probably spend almost as much time talking to parents, social workers, group home staff, case workers, case managers, and teachers as I do with my actual clients.

I often take calls in my car as I drive from appointment to appointment (I do inhome work) on my little bluetooth hookup. When I am lucky, I have phone meetings in my home office, aka, David's Workshop.  During these meetings, I can have my computer on, check appointments on Google calendar, pull up client notes and reports, take notes during the conversation, etc.  Its much more convenient for me to chat on the phone from the office.  My schedule doesn't always permit the privileged, but its nice when it does.


In my office, my back is to the door so anytime my wife
walks in, she can see exactly what I have up on my screen.
It keeps me honest.
A few weeks ago, I found a new activity to do while at home and on the phone when my hands were free.  I could slowly construct paper furniture for a future diorama.  Most of the time while I am on the phone, I need to be writing things down or using the computer, but sometimes I get a moment here and there.

I got the idea after visiting www.joedios.com and saw all the amazing ready-to-assmble, all-you-need-is-a-color-printer-a-scissors-and-some-glue, templates in the file section there. I pulled up some PDF files hosted at thesite that were made by JoeDios member Tracker. Tracker has made a bunch of really outstanding stuff. If you are looking for some ideas or items for action figure dioramas of your own, check out the pictures and files sections of JoeDios.  Its a treasure trove of cool.  I printed some images out on regular printer paper, and when I had time, cut them out, carefully folded the parts, and glued them together with regular school glue. The pictures in this update show the little chair and computer set up in their completed form. 

Cobra Vipers like to update their Facebook pages
and check their twitter feeds between missions to
hack into US satellite control systems.   
I am not entirely sure what I am going to do with this yet, but I have some ideas. I think someone would probably be able to construct the entire thing in 15-20 minutes.  Most of that time is just holding sections of paper together while the glue dries. But because putting this thing together was by far my last priority when on the phone, I did it a few seconds here and a few seconds there. I started this the week before Thanksgiving and finished it last night. 

Today I do not have any client meetings, but I needed a break from my school work so I thought I'd do a quick update on the blog of this little mini project.  I finished a 17 page paper yesterday and today I am working on a power point presentation.  I need to make a 10-15 minute  proposal for my graduate project, and my brain were starting to go a little fried.  Time for a break.

I hope you like this little update.  Tracker did an amazing job with his design.  It takes very little skill to make something that looks pretty slick and could be used in a lot of different ways. Tracker and other artists have created several different versions of this chair and computer design with different skins, in different colors so if you are not into the dark green/gray I have here, there are other choices.  Or you could run the thing though Photoshop or GIMP (the free, open source Photoshop!) and come up with your own ideas.

Ok- this break has gone on long enough. Time to get back to work. Take care.

Until next time,

David D.

Tuesday, November 29, 2011

Old Man Dremel Has Come And Gone

Woot!  Just got done with the first draft of a 15 page paper due Friday.  The best way to keep myself going was to tell myself that when I was done with this draft, I would let myself update the blog.

The gang is all here!  Everything I
needed for this step  is in this shot.
This latest step was actually really easy and really fast.  The step I am referring to is the "sanding down the rub spots" step.  Last time I finished taking the figure apart.  This time I want to dremel down the parts of the figure that could rub against each other when it is put back together.  Sanding those surfaces will keep friction from taking the paint off, leaving ugly scar marks on the figure.

In order to complete this step, I used my Black and Decker dremel that I picked up from Target, two different sanding tools (more about this later), and a mask to cover my mouth and nose.  I just grabbed the instructions for my dremel tool, er, "Rotary Tool", since it was made by Black and Decker and I think Dremel is tradmarked by the company that makes Dremels, and it looks like the 'sanding tools' are actually cutters.  Hmm.

My grandfather, who was a wiz with tools, and according to my mother, always said that "you need to use the right tool for the job", is probably rolling over in his grave. But what can I say- I'm learning this as I go, and didn't break anything, so I'm still calling this stage a qualified success.

The coarse cutting bit in action.
There were 6 items to sand: the 2 shoulder joints, the 2 elbow joints, and the 2 knee joints. I started with the shoulders and got use to the fact that breathing in the mask fogged up my glasses.  I tried adjusting the nose of the mask to minimize this.

I used the more coarse of my two cutting tools turn sanding tools, and used the lowest speed on my dremel, er, rotary tool.

I am going to get the hang of this.  Just you watch.

Based on my first experience with the rotary tool (natch), I learned that on the high setting, the cutting tool will cut through of action figure plastic like tear gas on through a Black Friday shopping mob.  Thus, I made sure I was on the lowest speed, because I don't want to destroy my work pieces.  I had no problems with the shoulder and elbow sections.  I rotary tool'ed (the verbing of America at work) 'em down just a little.  At the lowest speed, this took about 4 passes per area I was sanding down to get the joints the way I wanted them.

The fine cutting bit in action.
The knee joints were a little different.  As I mentioned above, the bit I used with the more coarse cutting bit of the two I have.  The plastic on the leg section of the action figures seemed to be different than the plastic on the arms, because instead of just sanding off, the tool left small, ugly, rough scars on the plastic.  I switched to the finer cutting bit to see if it would make and difference and kept the rotary tool speed on low.  That did the trick- no more scars on the plastic, and it was sanded down just a bit, just like the arm sections were.

As I said at the top, this was a really fast step. The rotary tool did kick up some plastic dust, so I was glad I had my mask on.  I don't know what happens if you breath plastic dust, but I bet it isn't good for me.  I didn't use goggles, although I have some and it probably would have been smart of me to do so. I figured my glasses would protect my eyes well enough, which is probably exactly what every guy with glasses thinks just before they have a horrible power tool accident that robs them of their sight.

Keeping the tools clean.
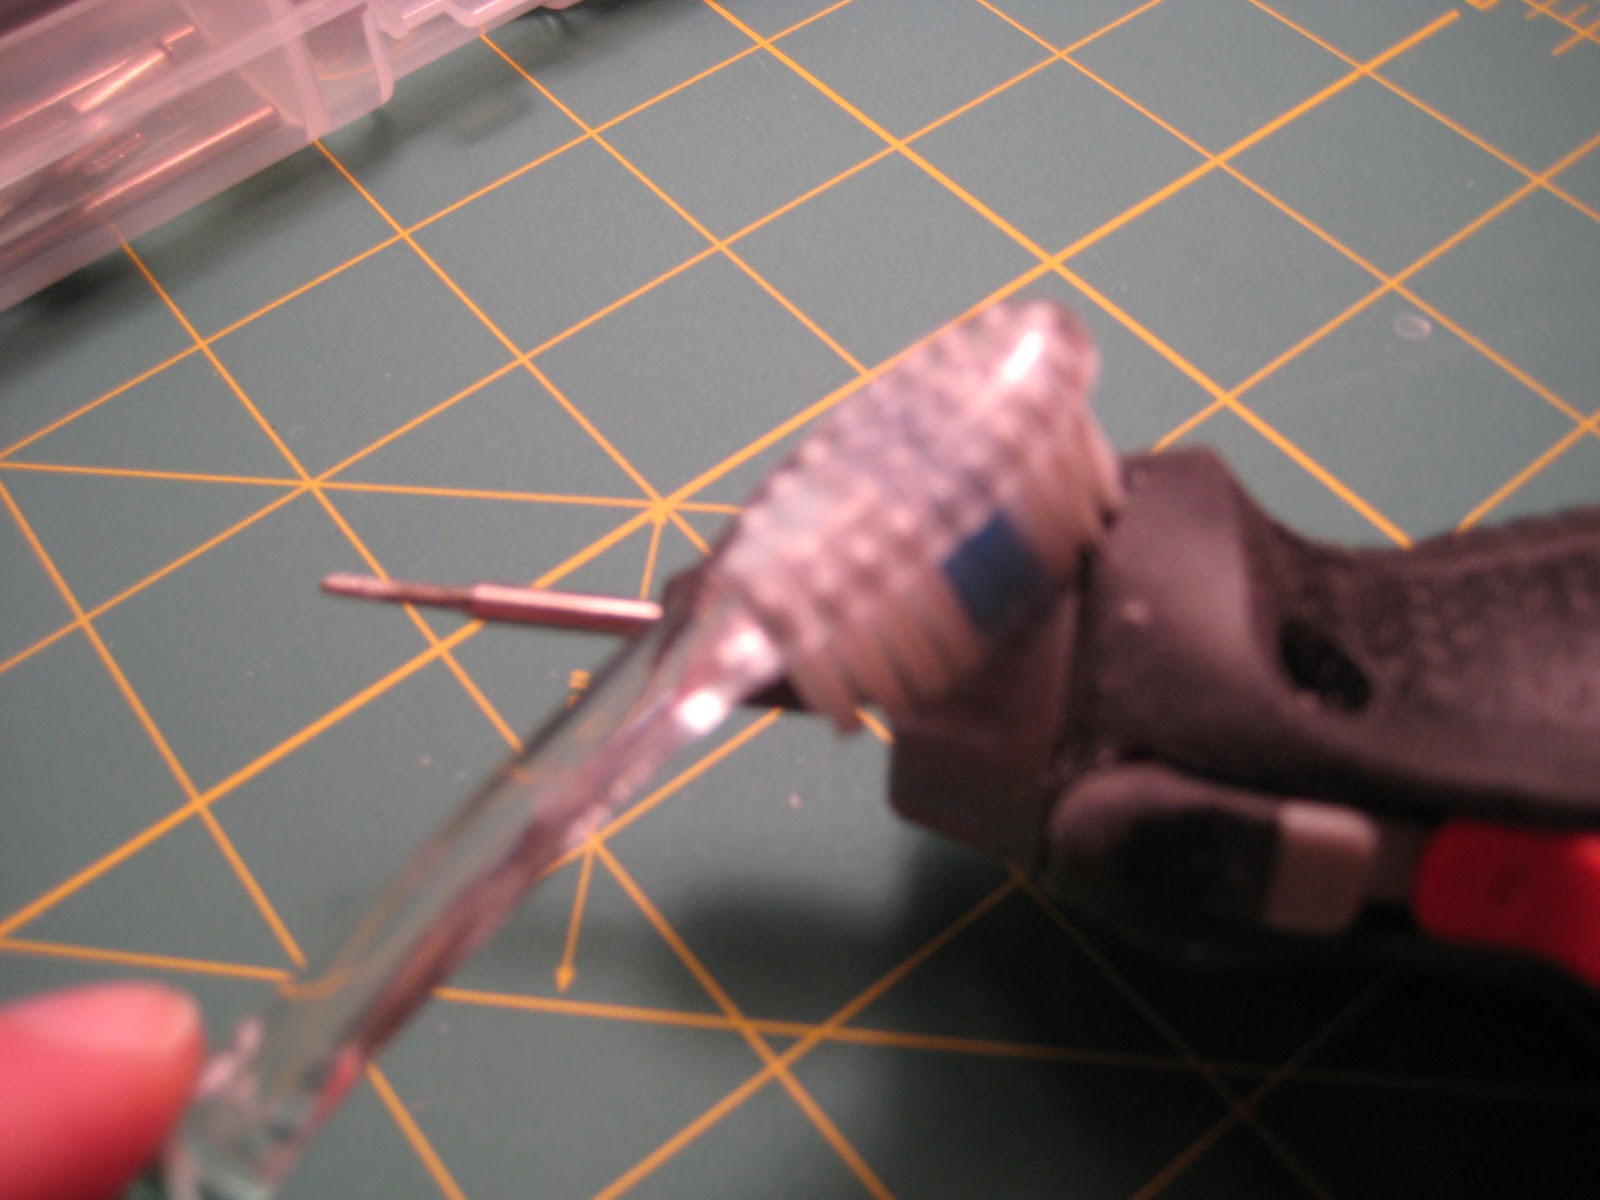
Because I am my grandfather's grandson, I know I need to take care of my tools.  One handy tip I learned during the great Build-A-HQ project is that a toothbrush is a great way to get plastic dust off of scoring knives and other tools.  I got that suggestion from another hobbyist website, but for the life of me, I cannot remember which one.  If I do remember, I'll post the credit for it.  The idea wasn't mine.  In any case, that toothbrush technique works great for getting the plastic dust off of rotary tools as well.  There wasn't a ton of dust in and on the tool, but I want my tools to be good for me, so I figure I should be good to my tools.  It only about 20 seconds of brushing to get everything cleaned up anyway.  Once everything was cleaned up, I put it all away.

I am still a little miffed about my using "cutters" to do something that it sounds to me like they are not designed to do.  As much as I would love to be a handyguy, I am about as far from one as a guy can be.  Is there a better bit to use with a rotary tool for sanding down plastic?  I'll have to check this out. Am I more concerned about this than I should be?  Without a doubt.  But I would like to be using the right tool for the job. 

The next step will be washing everything off and putting a base coat of paint on.  I plan on using black spray paint for the base coat, since according to my master text, black base coats make it easier to get shadows to happen in your miniatures.  I have one other copy of the same figure; I may do that one in a white spray paint base coat (which the book recommends for minutes that will be painted in bright colors) to contrast how the base coat impacts the final look of the figure.  The master text also has some other great suggestions about how to do the spray painting of the base coat, but I'll leave those suggestions for the next blog entry.

So!  Painting is on the agenda for next time.  Painting.  My favorite activity.  Wish me luck.

Until next time,

David D.

Sunday, November 27, 2011

Step One Complete

Hey folks.  Its been a busy Thanksgiving week and weekend.  My best friend Matt came to town.  He is a resident doc at a Big Deal hospital on the East Coast.  He and I met in college, and despite being one of, if not the smartest people I have ever met, he is completely down to earth and cool.   He is a giant video game nut and we spent plenty of time (when we weren't stuffing ourselves silly with too much food) on the playstation, hanging out, and just having a good time.  It was great.  I hope you all had a good Thanksgiving too if you celebrate it, or a good "lets celebrate the help that the native peoples gave starving strangers in a strange land, only to have those strangers decided to take over and kill the people who helped them" weekend, or, if you are not from the USA, a good "oh jeez, those crazy Americas are getting even fatter this weekend" weekend.

Oh shoot!  All my fellow readers from the USA are gone!

Anyway, for the 30% (now 100%!) or so of the readers from outside the USA still here...

When in doubt, read it out.
First announcement- my wife Laura, Matt and I ran to the mall at some point this weekend.  Laura picked up a present for me: Acrylic Painting for Dummies.  I'm a huge fan of the For Dummies series.  I've gone through at least a dozen of their books for IT related stuff, including Excel 2003 for dummies, Networks for Dummies, PCs for Dummies, Photoshop for Dummies, TCP/IP for Dummies, Unix for Dummies, etc.  They are great books written for beginners but have a tremendous amount of information in them and can serve as great references later on.  Each chapter is pretty well self contained, so you can skip the sections you aren't interested in reading or don't need to read without screwing yourself later on.  I would love to take some classes on acrylic painting to learn some brush techniques and just general tips about painting, but what I have found doesn't really fit into my schedule.  We have an extensive community ed program in St. Paul, MN where I live, but the classes tend to be at night, and I already go to school at night, or, since I work as a life skills worker with teen guys, tend to have my client sessions at night, and thus, those classes don't work.  Between Acrylic Painting for Dummies and the book mentioned grabbing in my last post, How to Paint Citadel Miniatures, I think I'll be able to teach myself plenty in the weeks ahead.  It makes me feel like I'm going to have the know how to pick up my figure painting game and make some progress detailing my figures.

Yeah, that was a pretty intensely dorky sentence.  Moving on to the real meat of the update.

So where am I with the current project?

Revisions with the master plan have already taken place.  I was originally planning on dremeling down the rub zones, such as the knee, shoulder and elbow joints, on the figure, and then taking it apart.  Well, I tried that but the dremel had a hard time getting the joints without rubbing on the rest of the figure.  I didn't do much damage, but I noticed that things were not going according to plan.

So an alteration is in order:

Old:

1. dremel down the the rub points in the shoulders, elbows, hips and knees. 
2. disassemble the figure, including removing the lower legs/arms from the upper legs arms through the use of a hair dryer. 

OUTDATED.  DELETE OBSOLETE INSTRUCTIONS.  OVERWRITE.

New: 

1. disassemble the figure, including removing the lower legs/arms from the upper legs arms through the use of a hair dryer.
2. dremel down the the rub points in the shoulders, elbows and knees. 

INSTRUCTIONS UPDATED.  

PLAN ALTERATION COMPLETE. 

Score one for the The Corps action figures:
They are easy to take apart.
The good news is that it is really, really easy to take apart action figures from The Corps line. A single screw in the back holds the figure together.  That screw is easily reached by a Phillips head screw driver (sorry, don't remember the size, but it isn't an exotic gauge or incredibly small or anything like that- I had the right sized screw driver in my work bench.) Once the screw is removed, the front and back torso of the action figure come apart, and the waist, arms and head are easily removed.  Besides the screw itself, there are no other methods of fastening the figure together. No body cracking with a vice like you evidently need to do with modern GI Joe figures is necessarily, which is kind of nice.  The less opportunity for screw ups, I think, the better I will do at this point.

My wife's hairdryer to the rescue!
At the same time, this level of disassembly does not make it any easier to actually dremel down the knee, elbow or shoulder joints.  More work needs to be done to separate those parts.

Thankfully, I have done enough research about taking action figures apart to know there are two good and worthwhile methods to use here: either heat a joint with a hairdryer or put the pieces in a cup of water that has been in the microwave for a minute or so.  Because it seemed the hairdryer method would be easier to use if I needed to reheat the plastic, I went with that. 

Protect your digits.  Don't put them in front
of  streams of super hot air from hairdryers. 
Instead, put  plastic held by clothespins in front
of steams  of super hot air from hairdryers.

In order to keep from burning my fingers, I used a clothespin to hold the plastic limbs.   This kept my fingers from getting fried and allowed me to hold the plastic in front of the hairdryer set on hot for about 60 seconds, which is about what it seemed to take to get the plastic warm enough to pop the various joints.  While holding each joint in front of the hair dryer, I slowly turned the limb so that the joint was heated on all sides.

Another tool that helped to pop the joints apart was my Eklind multihex key tool.  These are great little tools that can be found for about $2 or $3 at the hardware store.  I used the smallest hex key on my foldout set to pry into the spaces of the joint and push the hot, flexible plastic apart.  The smallest tool on my kit was 5/64th inch or thereabouts, and the metal on plastic gave me a lot more leverage than I could have mustered using my fingers and fingernails alone.

And this little piggy pries plastic
joints apart all the way home.
The key to this step was patience.  The plastic is pretty malleable after 60 seconds of hot air from the hairdryer, and I was worried that I could tear it with the hex key if I got too rough.  Also, the plastic becomes cool fast.  I found that I had a good 20 seconds to work with the plastic after 60 seconds of heating.  Using my fingers alone didn't seem fast enough to take the joints apart.  If I couldn't get the joints popped in 20 seconds, I applied another round of 60 seconds of hot air to the joints, and tried again.

Eventually, everything worked just fine.  I went to school on the first few joints, and applied what I learned to the rest.  Each joint in this action figure was held together by a little peg.  The pegs had big end and small end, which will be nice later on because when I reassemble the figure, there is only one way for the pegs to be put back into each joint.  I learned quickly that trying to pry the small side of the peg from the joint was a much faster way to take the joint apart than by trying the big side or trying to pry both sides at once.  In a few minutes, I had all the joints popped apart.

Woo hoo!
I gotta say, it was pretty satisfying to see Shinto-San all taken apart without any parts broken or other mistakes made at this point.  I could have tried to break the figure down even further: the pin joints of the elbows have pegs in them that attach them to the upper arm, allowing the joint to rotate in 3 dimensions, and the hips are connected to the lower torso by peg joints as well.  In both of these cases, I didn't think there was much give going on there to pop the joints, and I also didn't think these were vital areas to pop to make painting easier or dremel work look better, so I let sleeping dogs lie.

Because there were so many parts and because my wife and I have two loving, wonderful, sweet, and completely ADHD cats who will play with *anything* they can get their paws on that isn't nailed down, I have put all the pieces of the figure into little compartments to keep them secured. Each of the joint pegs are unique to the joint they fit into, so finding the correct peg for each joint should not be a deal later on, but I still separated the parts by portion of the body.  Even without cats, I didn't want to throw all of the parts into a drawer or something; they are small, and I figure the work I am putting into this project make taking a little care of accounting for all of the parts well warranted.  I would *hate* to get nearly done with all of this only to realize a forearm or knee joint was missing.

So that is where I am at the moment.  Finals are coming up, and I've got a ton of papers to research for and then write, but I hope to have at least all of the rub areas dremeled down and have an update on the project inside of a week.  Take care.

Until next time,

David D.

999 blog hits

Hey folks-

When I logged in today to start writing my next post, I saw that I have had 999 hits on my blog since I started.  To all of you who have been out there reading my blog and sending me emails or posting comments of suggestions, ideas, encouragement, and your own stories, thanks very much.  I can't tell you how much it means to have a little section of the internet that people actually find worthwhile to check out, and I cannot tell you how much I appreciate your support.  Gracias, amigos y amigas.

David

Sunday, November 20, 2011

A new project begins

Brushwork worthy of kindergartners!
It has been a dark time for David's Workshop.  While David did enjoy building the HQ display and painting the coyote, it was clear to David that he had reached the limits of his painting skills, especially in terms painting individual action figures. Despite the fact he researched action figure painting techniques like crazy on the web, he was stuck just not quite getting it.  His figures looked like a mess, and David was frustrated.

Hope seemed lost.  Nothing seemed to be working out the way he wanted it to, and the path to improvement seemed lost.  Buying action figures to practice with was expensive- Joes were $8.00 a pop at least at the local Target and Walmart, and David didn't seem to have the hand control or the sense of what he was doing to justify painting figure after figure after figure with the same cruddy results time and time again.  David was about to throw in the towel.

Spay paint that looked horrible!
But Lo!  In his darkest hour, David walked into the store Air Traffic at the mall during a break in holiday gift purchasing.  Air Traffic is a great store based out of the Twin Cities of St. Paul and Minneapolis that carries games, smart kid toys, kites, disc golf, model rockets and juggling supplies, as well as Warhammer 40K items and Games Workshop painting supplies.  Basically, it is a nerd store camouflaged as toy/game store.

David loves Air Traffic.

Even before he started work on his workshop, he would often walk in and look at the display cases of Warhammer armies with longing and wish he was skilled enough to paint as well as the people who had painted those miniatures, as well as the guts to actually buy miniatures like them and paint 'em.  David was raised by parents who were good, but not very open to their son being interested in nerdy pastimes like RPGs and minitures, so David was forced to enjoy them from afar.  Since his teenage days, he had been especially impressed with the folks who painted miniatures.  The people who did it well had crazy amazing skills.  The creativity to come up with a plan and the ability to execute on that plan, resulting in such such awesome final products made him a fan of anyone who can paint figurines well, regardless of how annoying anyone but their mother finds them or their ratio of years on this planet to the number of sexual experiences they have had with people other then themselves. These people were doing something they enjoyed, and it was something David did not have the guts to try on his own.  He feared the disapproval of his parents, and he feared sucking at it.

By the power of Grayskulll! 
I HAVE THE POWER!!!!!
But times change.  On this day at Air Traffic at the mall, (just last week), David found the book How to Paint Citadel Miniatures on the shelves next to all the other Warhammer 40K guidebooks.  It was a sign.  He picked up the book and flipped through it.  It wasn't just the full color illustrations that caught his eye-it was the step by step instructions on how to paint plastic miniatures in a bunch of different ways.  There were sections of preparation, color theory, blending, techniques to steady one's hands when painting, how to add effects like rust and wear to the painted object, dry brushing, diluting paint, washes, the list just went on and on.  The book was $30, which seemed pretty insane, but he had tried so many times and really wanted to get good at this.  So he bit the bullet and bought the book.

On top of this, his local Walmart sold a line of figures called The Corps, which were only about $1 each when you purchased in 3 packs.  The figures are not as nice as Joes, but they are inexpensive, easy to take apart, identical in size, and nearly identical in complexity of figure and accessories.  Take the guy I have over here.  His name is Kinji "Rain" Shinto and according to his packaging, he is part of the Corps Shinobi Squad specialized ninja assault team.

I am going to be fodder for David's next project!
This brings us to now, and I'll leave more summary third person past tense and switch gears to more intimate first person present tense. 

Ok, save your cracks about western stereotypes about Japan and far eastern culture. David thinks: duly noted.  Especially since Mr. Shinto-San's skin is as white as the peachiest of peachy peaches.  But this figure has potential.  He has nine points of articulation- knees, hips, elbows, shoulder (ball joints) and head.  He has three accessories- a bad ass looking pistol, a ninjaken (aka ninja sword, thank you google). and a totally inaccurate but still cool looking spinny throwing knife looking thing.  All of these items can be carried on Mr. Shinto-San's person.  The figure has a built-in sheath on his back, a holster for the gun on his right shin, and the handle for the spinny throwing knife fits into the hole in his back where the screw that holds the figure together goes.  In addition, the detail in the figure, while not great, isn't horrible.  His boots and chest armor are especially detailed.  He needs a new skin tone, and the copy paper white pants need to go, and his weapons need some paint as well, but I think this guy could be slick.  And now I'm armed with the book and I've got the courage to try a new project.

Alas, time has run short on this weekend, and I don't have time to start work on the project, take the pictures and write an update.  I haven't done an update in a while, so I thought I would take care of that, and then over the next week start work on the project.  When I have some results, I'll post it.  At the moment, here is my plan: 

1. dremel down the the rub points in the shoulders, elbows, hips and knees. 
2. disassemble the figure, including removing the lower legs/arms from the upper legs arms through the use of a hair dryer. 
3. wash all the pieces in water to get grease and whatever else is on them off.
4. spray paint the pieces while for a base coat with plastic friendly spray paint.
5. pick a color theme.  I am thinking either black/green/yellow or silver/blue/black, plus a more asian skin tone. 
6. engage that theme with the painting skills I pick up from the book!
7. go slow.
8. have fun.
repeat 6-8 over and over.
9. profit!

We'll see how it all goes.


Until next time,

David D.

Tuesday, November 8, 2011

Dusty Presents: the Bravo Team M3A2 Bradley


Hey kids!  My name is Dusty.  Since David has been busy
as hell, I decided I would write up a blog update for him.


It is pretty sad that David can't do his own updates,
but honestly, I don't think he's up to it.  He has been over
there at the computer writing page after page for his classes,
and crying like a baby all the while.  Something about lit
reviews and analyzing test results.  Since when is that hard?

Frankly, I'm a little worried about him.  I may not be the one in
school to become a doctor of psychology, but based on his late nights.
the piles of books and journal on his desk that he just doesn't stop reading
and all the open weeping, I think there may be some self-hatred going on
there that he needs to address.
But enough about cry baby pants.  Today I want to talk to you about
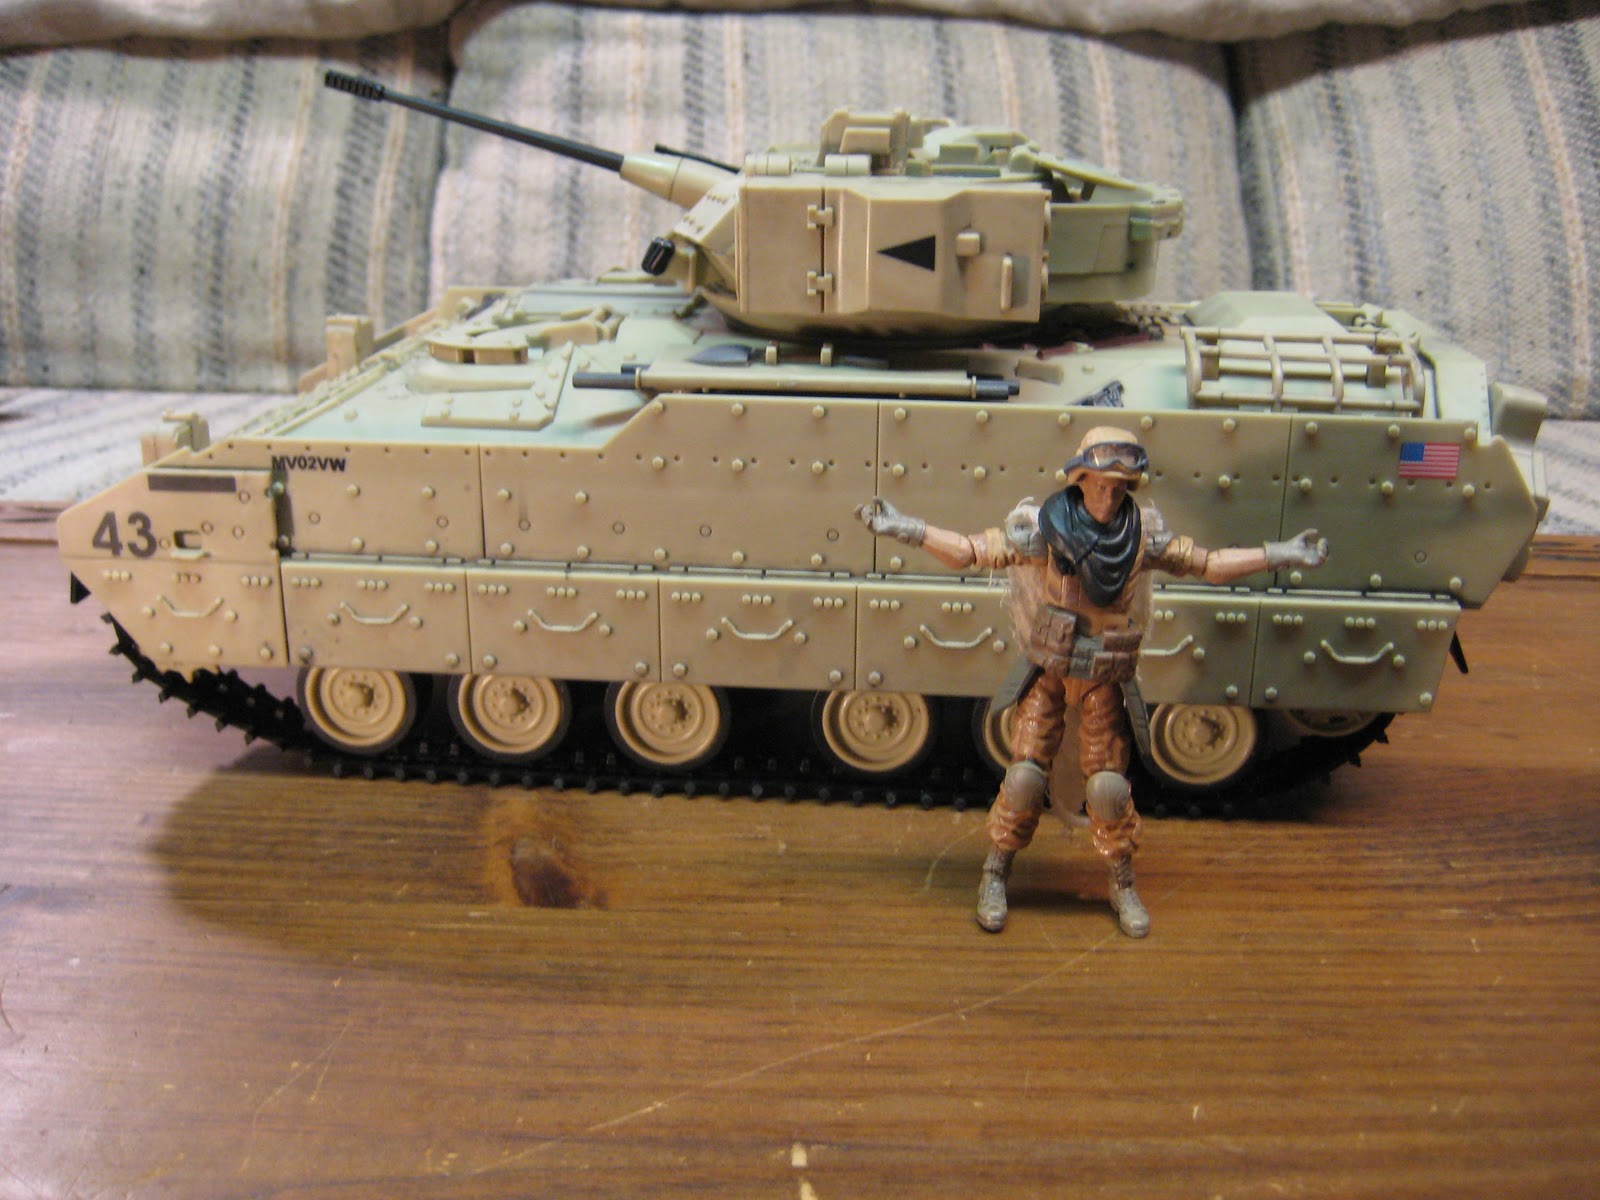
my new ride, the Bravo Team US M3A2 Bradley Fighting Vehicle. 
Its 1:18th scale and ready to rock.
And Meesa friend Dusta said I could help!
::sigh:: yeah, I did say Jar Jar could help.  In any case, this thing
is THE SHIT.  It isn't part of the GI Joe line.  It part of the  Bravo Team brand,
made by Unimax and sold in the US, exclusively, as far as I can tell, at Target. 
Don't try looking for it at KMart, Walmart, or TRU.  You won't find it there.
Now different minds can disagree, but there is a lot of toy here.
Unlike most GI Joe toys, however, this thing comes completely
built out of the box.  No pieces to put on or parts to assemble.
Don't slip, Jar Jar.
But this thing is solid as a rock. There is some high grade, sturdy
plastic going on here that is far nicer than the stuff you see in
the current crop of action figure vehicles out of Hasbro or Mattel, let
me tell you.  If this thing fall out of your hands, nothing is breaking
or coming apart. Its going to stay together no problem.


Far more so than the Sky Sweeper.
Also, there are no decals or stickers of any kind going on here. 
All the labels and graphics are painted on at the factory.  If you
have some left over 'Joe stickers, you would easily add them.
There are plenty of flat spaces where they could be applied.
And the painting applications are great.  So it looks great, right?
But what about those all important action action features???
First of all, the turret turns...
a...
full...
360!  Stop playing under the APC, Jar Jar

Jar Jar: Messa stuck! 
The gun tracks vertically as well.  Down...
...and up.  See, I'm a gentleman, and I will not be making
and crude jokes about the Bradley being happy to see
David's Natalie Portman poster collection, which
is posted up behind the photographer.
Two of the hatches open and close, and can each fit
a single standard sized 1:18th action figure.
However, this hatch is just for show and does
now actually open.  Hey modders, you have
your objective.  Finish this bad boy!
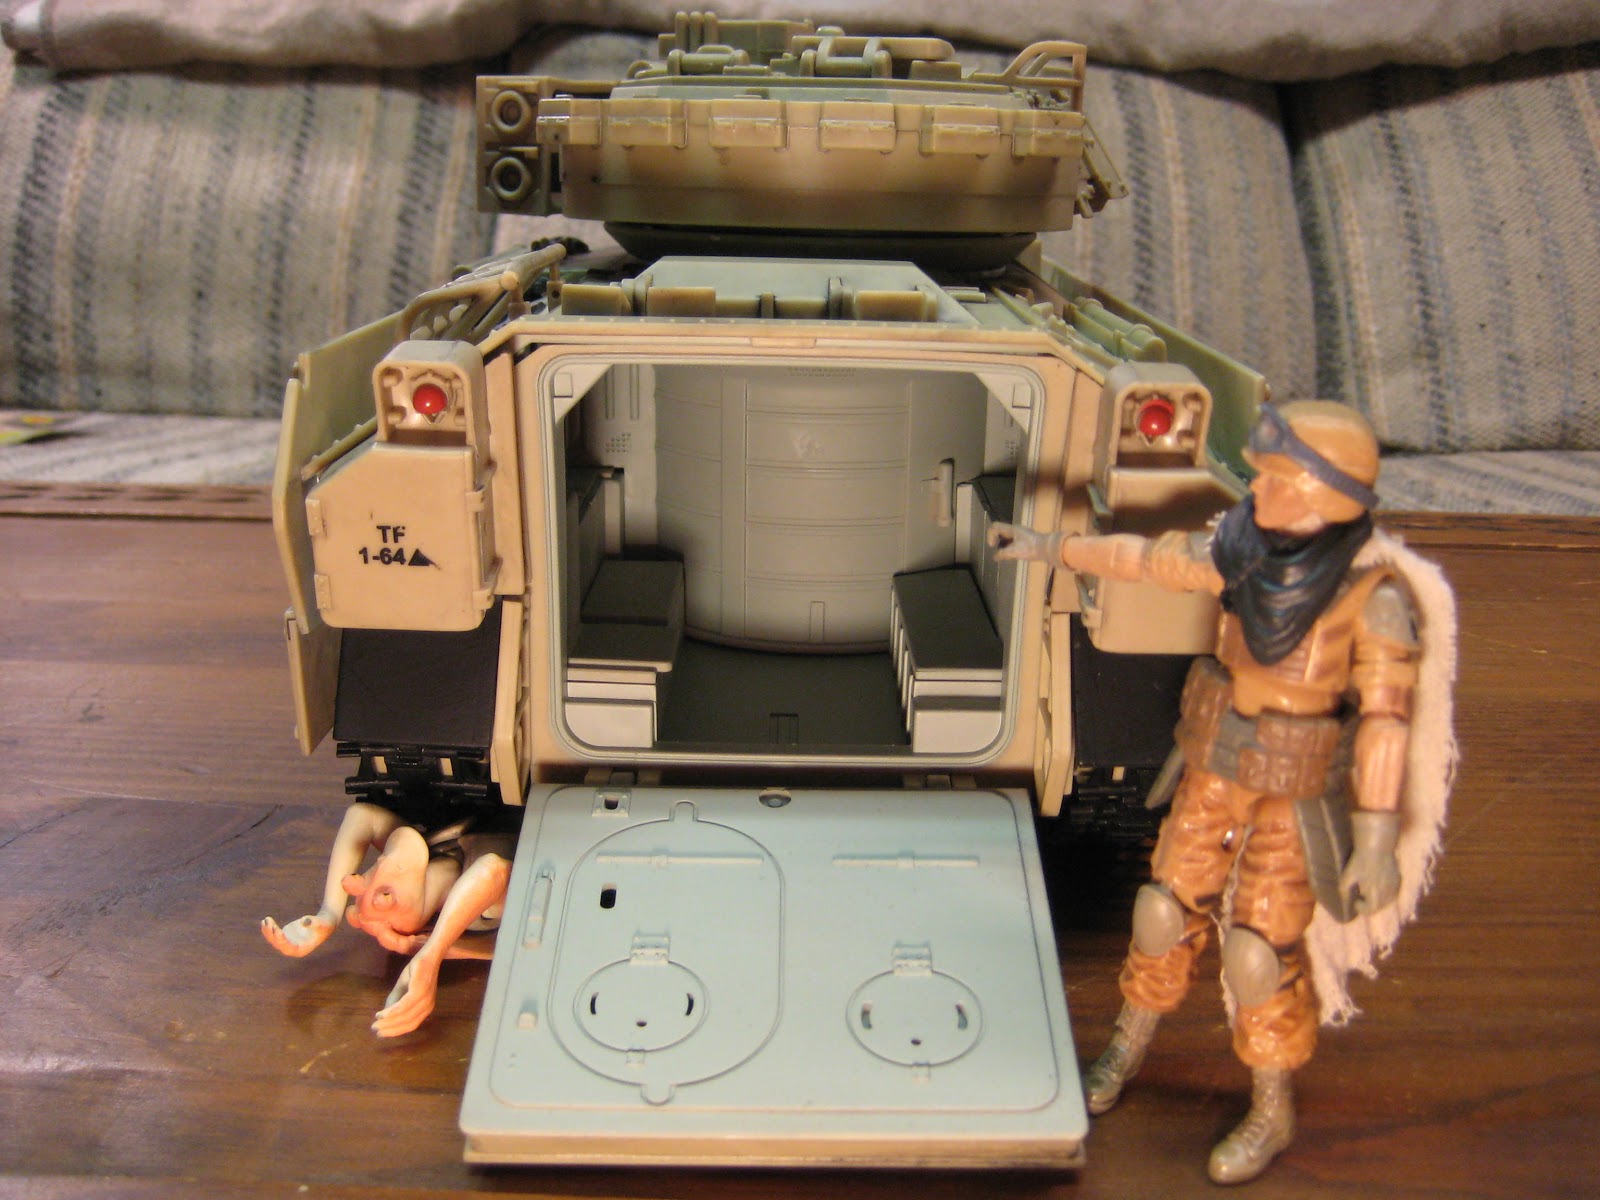
Finally, we have an opening back access way and room for
4 regular sized 1:18th scale action figures, although the ceiling
is pretty low, so it makes kind of a cramped fit.

I think Jar Jar can attest to the fact that the Bravo Team M3A2
Bradley fighting vehicle also has real rubber treads and 6 working
wheels on each side.  When this thing rolls out, it moves right.


All in all, I think this is a really nice item.  I need to go take
Jar Jar to the Hoth Medical Bay playset to fix his broken
bones and crushed internal organs.  But I'll see you around!


Well, I'm lucky Dusty had the time to update the blog.  It's been too long.  I am grad that I am finished with last week.  Six papers to turn in between Monday and Friday, and that meant over 70 pages of writing.  And all of it was stuff the required work before hand- article critiques, assessments to give and then write up, a preliminary doctoral project proposal... so glad it is behind me.  On the bright side of things, it was my wife's birthday on Friday, and we had a great party here at the house on Saturday.  My wife's cousin, Abe, was one of our guests and he is a professional graphic designer and artist.  He's a fan of the Warhammer: 40k game, and has a really impressive Chaos Warriors army.  He came down to the Man Lair where I keep my stuff and saw my little workshop, and said he would help me with the clipper.  So that's cool as hell.  To be scheduled, but its nice to have someone who knows what he's doing offering to help me out on that one.

I'm also a very lucky guy to have such a wonderful wife, Laura, who has been there for me these last 6 years.  Laura pointed out a few weeks ago that we've not been together for 10 years. That's a long time.  She is the light of my life and every day I still feel, in the words of Shakespeare, nothing can be ill if she be well. I hope all of you have or find someone who is as good to you as she is to me, and who you can be good back to in return.  In any case, I should get back to work.  I hope you have all been well.  I'll be back in less than a week with a new update.  

Until next time,

David D.