Showing posts with label customs. Show all posts

Wednesday, September 28, 2011

Time to Build-A-Headquarters

So the way I see it, the centerpiece of an action figure collection is the playset.  When I was a kid, I had all of my He-Man figures arranged around Castle Greyskull, and Skeletor and his minions arranged around Snake Mountain.  But now I've got this collection of Joes and vehicles, but no playset for them.  I do have a Terrordrome (only missing the gun tips for the lower guns- almost complete!) but the Joes still need a place to call home.  I've been looking around for projects in my ability level, and I found

Vexar Design's Build-A-HQ Tactical Operations Center.

This is what I am going for.  Image Credit: Vexar Design
Holy Effing sweet. Its a playset that looks cool as hell that someone with some inexpensive tools, money for supplies and patience can build themselves.  That's two birds with one stone, the way I see it. I decided to take this project up a few days ago, and so far so good.  I love a lot of things about this project.  Here is a list of them.

1. Its modular, so I can add rooms as I see fit.
2. I get to put it together myself!
When I am done with the first section, I plan on
branching out like Canesfan0245 did.  
Work and Image Credit: Canesfan0245 & JoeCustoms
3. I get to work with new materials and build some skills there.
4. Vexar's website has the designs to build the thing (more or less) step by step.
4. Vexar's design is cool, and they have images on the website that can be used for decals right there.
5. It's a freaking action figure playset that doesn't suck!

Canesfan0245 over at JoeCustoms.com worked from the Vexar design and made several other rooms based on it, and the work looks tight.  This little project looked like the perfect next activity to launch into.  So far I am a few hours in (yes, I did say a few hours.  Cutting the styrene takes a long time at the moment.) but I am making progress.  I picked up all the parts Vexar lists on the website to purchase.  Thankfully, my local hobby shop carries the Evergreen Scale Model brand styrene that Vexar recommends AND Vexar identified by item number exactly what stuff to buy.  This turned what could have been an hour shopping trip into a 10 minute shopping trip, because there are lots and lots and lots of types of styrene made by Evergreen in different dimensions, and many of them are very close in size.

My poor xacto knife!  Thank goodness for my sharpener
(the grey and orange item top right corner).  My sharpener
is the unsung hero of this project so far.
So far I have the four six inch columns cut out, the four five mm corner brackets cut out, and the front and back walls cut out. It took me about 30 minutes cut the five mm corner brackets with my xacto knife, and involves plenty of resharpening during that time.  If anyone has any better ideas about how to cut those bad boys out, please let me know.  I have a saw, but I don't know if a saw is the right tool to use on the styrene square tubing.  I also have the door cut out, and I attached the back wall to the floor. 

I purchased two cans of Krylon Satin River Rock color Fusion For Plastic brand spray paint that I will use to give the white sections a more grey/tan color, because I'm not a huge fan of the blinding white of the naked styrene.  I hope this goes well.  I should probably get a section of styrene and do a trial spray paint run first to make sure the paint adheres to the plastic before I go nuts spraying the entire model itself...  note to self: yeah. Do the practice piece first.  But hopefully that will work.

I can follow directions!  They say line the floor up to a wall
to make sure the back wall section glues at a 90 degree
angle.  So put it up against my wall I did. 
If you look at the instructions on the Vexar Design's website, you will see that I am in the middle of step 7.  I do plan on doing the optional step 8 to create the light switch and conduit because it does not look like it will take much more work and because the results look really nice, and give the project a much more real life, lived in look.  I am really getting ahead of myself here, but the next section that I would like to do will be a mission briefing room/dojo/if there is room/work out room.  If there isn't room for a third room, I will combine the dojo and the workout room into one space.  I plan on having this section just to the right of the section I am working on, running parallel to the tac ops panel.  The mission briefing room will be in front and the dojo will be behind it, and an hallway will run along both rooms running lengthwise along the module.  So that's where I am thus far.  More as this thing continues.

Until next time,

David D.

Saturday, September 24, 2011

First Custom Figs!

As easy as this was to do, they look pretty sweet.
Well, I did it.  I made my first custom figures (using processes that involved altering figures in ways that do not include repainting the figures) today.

Yeah baby.  I'm in it thick now.

Ok ok, its nothing too exciting- one of them was just a head switch, and the other is a head switch with some dremel work.  But I think they turned out pretty well.

I ran over to TRU today while doing some errands to see if the Renegades wave was in yet- I haven't had any luck all week finding the new figures, even though it sounds like there are out in a lot of other parts of the country.  The TRU I visited did not have them, but they did have almost the entire first wave of the 30th anniversary Joe figure line except for Hazard Viper, but that was cool because I already have that wave.  But I got to thinking... man... that Iron Granadier is one cool looking figure.  His head is cool, his armor is cool, his weapons are cool... wouldn't it be awesome to see if I could hollow out his helmet and put a Joe head under there so they could run around in an Iron Granadier disguise?

Sgt. Stalker was there too, and I gotta say, this guy has one of the best head sculpts going.  He just looks badass.  I knew that something would have to happen with his hair to get the idea to work- I'd probably have to use my xacto knife to remove it, but what they hey.  So I picked up two Iron Granadiers and one Stalker.  I had a Rise of Cobra Duke sitting in a box of figures I had picked up at TJ Maxx not long ago to be used for parts.  And say what you want about the movie, I really like the head sculpt of that Duke figure too.  I figured I'd try making a Duke in IG costume and a Sgt. Stalker in IG costume, both with removable helmets, and see how it went.  Ideally, both would work out, and if I screwed up with one helmet, I'd still have the one more to work with.
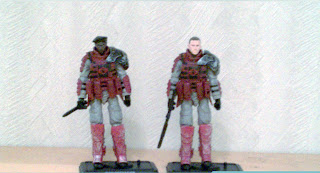
Here they are: after the win but before the fall.
Ok- I got home and got the packages open.  Bad news. There is no way I was going to be able to get the IG helmet over the Duke or Stalker's melon. I had noticed that it would be tough to get Stalker's beret in there back at the store, but once I had the figures out and the heads popped off, it was pretty clear that even though the helmet looks huge on the figure, it is almost exactly the same size as the heads for Stalker or Duke.  Just hollowing the helmet out was not going to work. Time for a new plan.
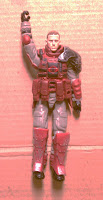
Yo Joe!
And one came.  When I popped Duke's head on the IG figure, it looked pretty sweet.  Really.  The details in the armor and the details in the head worked well together.  The color pallets were completely compatible.  Even without a removable helmet, this was a pretty cool looking figure.  It would look even cooler with the helmet, but that would take some work. I'd need to make the helmet longer- perhaps that would mean hollowing the thing out, then cutting it into a front and back half and adding some apoxy or whatever to lengthen the thing.  And that would take a bit of work, not to mention supplies and expertise that I didn't have at the moment.  I was looking for a simple win with this project.  My first first custom figure was a situation where I bit off a bit more than I could chew, and I didn't want to repeat that adventure.  I'll be honest- this was a confidence building exercise.  I wanted it to work out, I wanted something that looked cool, but I also wanted to do something that was within my competency level.
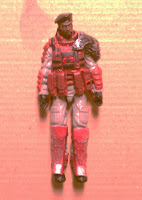
I may be an E5 and Duke
an O4, but he WISHES
he looked this good.

When I put Sgt. Stalker's head on the peg to get an idea of how it would look, I was impressed.  Again, the detail of the head worked well with the detail of the rest of the figure, and again, the color pallets were complimentary.  Sgt. Stalker has a much more hardcore look than ROC Duke, and if I could get this to work, I thought this would look like the much nicer figure.  I could not put the head all the way down on the peg however, because the back of the collar of the Iron Granadier was in the way of Stalker's dreadlocks. It would have to go, and perhaps, the handle on the back of the armor would need to go as well, since Stalker's dreads fall down along his back.
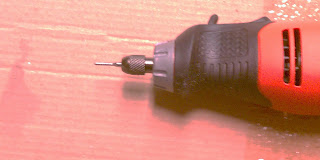
Mini Sanding Tool is a go!
I purchased a Black & Decker Dremel from Target a few weeks ago knowing that if I kept things up with this little hobby of mine, I was going to need one sooner or later.  I also grabbed some additional dremel bits because the actual kit came with very few on its own.  I threw the 'light' sanding tool into the dremel and figured there was a first time for everything. I really hoped I wouldn't destroy the figure.   But I had a plan- I would start using the tool on the "low" setting and go as slow as possible.  Kind of like starting a drilling project with the smallest bit; you can't blow it too bad if your bit is smaller than the screw you want to put in the wall (or whatever.) Same deal here.  If I needed more umph, I could always dial it up. 
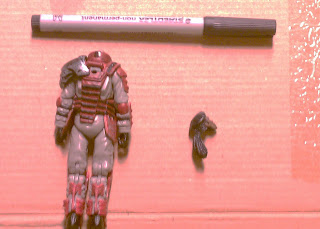
If you don't like it put a black dot on it.
I also checked out the part of the collar where it seemed to intersect with Sgt. Stalker's hair and marked it with a black felt tip art marker. I figured I could use that to tell where I should be focusing my sanding work and give me a visual.  Being the safe guy that I am, I also threw on some plastic goggles.  It would turn out I didn't really need them, but this was my first run and I wasn't about to risk my eyes on a project.   I also took the armor off the figure itself, as I figured I could damage the body in some way if I kept it on there, and didn't want to risk that.
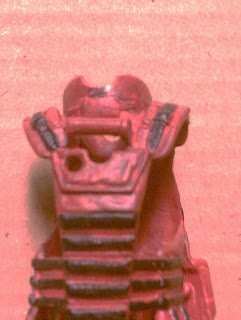
Dremel work in progress.
 And then I just jumped in with that dremel.   The goings were slow.  The kind of plastic the armor is made out of just did not give much on the low setting.  So I pulled the tool away from the figure and decided, 'here goes nothing', and set the speed adjustment to 'middle'.  And then it was a whole new ballgame.

The dremel tore threw the plastic like a smart phone enabled scalper threw a fully stocked toy store. I used short, brief motions to dremel small portions of the plastic away because I figured that if I held the dremel on the plastic for more than a few fractions of a second, it would slash right threw it.  After some progress, I would put the armor back on the figure, and then try Sgt. Stalker's head on the thing, to see how it lined up and where I needed to do additional work.

All in all, it worked out really well.  I got the collar chiseled out just right so the hair passed through it where the hair is bound up, and even better, the way the dreadlocks spread out covered the gap int he collar.  I also did some dremel work on the handle-looking section of armor that stands out from the back of the figure below the collar line so the hear could rest closer to the back of the figure. Again, I would dremel a bit, then test with the Stalker's head to see where more dremeling was needed, and after a few iterations had a nice set up.  Stalker can't really turn his head too successfully in this set up, but he looks pretty cool standing and looking straight ahead.

And that's it!  Both Stalker and Duke look great in their new Iron Granadier customs.  It didn't take much work to do, but I'm calling this a win on account of the fact it was an original idea that I came up with and it ended up looking sweet, and because I was able to accomplish what I set out to do, and because I got some experience with the dremel and didn't destroy any action figures to the point that I couldn't create what I set out to create with the items I had when I started the project.  So- success!  Woo!

Until next time.

David D.

Training session with Sgt. Stalker.

Ok maggots.  Lets go over some close quarters defense when you are in gigantic
movement confining armor suits you grabbed off of an enemy trooper.

Because you never know when one of their buddies is going to show up
and try to stab you in the back with a huge ass knife.

They key is to pay attention, and to react as quickly as possible.  Grab their wrist using
self defense technique one echo niner, (You should all have that practiced after your session
with Snake Eyes) and give the guy a toss over your shoulder. Leverage is key.  Make sure you
use their momentum to help them on their way.

Now that you have the guy on the ground, you should be able to take them out.  Crush their throat,
gauge out their eyes, maybe just knock 'em out in case you want them for questioning later.

And that concludes this demonstration here today.  Remember what you saw here and stay loose.  And
remember not to never to come up short at the bar, or you'll owe me one and that'll mean you could
end up serving as a practice dummy for my next martial arts demonstration.  Right, Duke?


Monday, September 5, 2011

Spray Nozzle Surprise!

Yes!
I have to say this for fail:  its good that we have it.  If it wasn't for fail, we'd never try new things.  We'd do everything the same we we did it the first time, because why change what works?  Without fail, there would be no pride in achievement. .  There would be no savoring of accomplishment.  If we didn't have fail, how would we laugh at ourselves?

Because if you can't laugh at yourself, you are missing out on one of life's best comedies.  Today's fail tale: David's spray nozzle fiasco.

When I first worked on the Coyote a few months back, I used Krylon spray paint.  When the paint came out of the can, it really splattered all over the place.  I didn't know if it was the temperature, (it had been in the 90's,) or my technique, or maybe that's just how spray paint worked, and in the few cases where I had used spray paint in the past, I hadn't really noticed.  Maybe I was just anxious because I wanted the project to turn out well, and really, it was was fine and that's the way its suppose to be.

Uh-huh.

No!
Well, I was at Walmart today to pick up some spray on primer.  I was in the paint aisle, and I was looking at the different colors of primer- I found some white and gray and black and red brown ("burnt sienna") and I was reading the cans to see how long it took to try and how long it took before the objects I was painting were safe to handle.  And I noticed a little diagram on one of the containers.

According to the diagram, on the nozzle of this particular spray paint can is a removeable, little plastic plug.  It is set into the opening where the paint rushes out of the spray can.  It is actually suppose to be there, and in the diagram, I was shown how it is suppose to be used to control the flow of the paint.  You can twist it up and down to get a more vertical spray, twist it to the side to get a more horizontal spray, or diagonal to get a horiz-tical spray.   

In my first project, I assumed that the little plug was a cap meant to make sure the paint doesn't get out of the can during transit, or something, and pulled the thing out.

SMOOTH MOVE, EX-LAX.

The hero of the hour!
Way to check those directions.  (To be fair, not all of the cans of paint have the diagram showing how to twist the nozzle on them).  When I got home and tried the spray primer without pulling the little tip off, check it out, the spray was very easy to control and not spotty or splattery AT ALL.

So I figured something out!  Don't pull out that little cap from the spray paint, because it is suppose to be there, and because it makes your paint application work much better!

So from the initial fail came renewed interest in how to do things right, which led to me investigate painting further, which led to me figuring out NOT to take out the plug, which lead to

LEARNING

and now, satisfaction that I got the thing right.

Because in the end, what we are really about in our hobbies is satisfaction, right?  Well, if it wasn't for fail, if it wasn't for the fact I was not satisfied with how the spray job went before, I would not feel the satisfaction I feel right now.  So, thanks Fail.  I think.

Next time: David discovers amazing cheap action figures to use for practicing his painting and modding techniques!   I need more time for that post, but it'll be good.  I promise.


Until then,


David D.

Friday, September 2, 2011

My other current project...

Vroom vroom!!!
Here it is- a sneak peak at my other current project.  This one involves actually cutting things apart and putting parts from different toys together into something else. 

Now, someone with a sharp eye might say, "Hey, this looks kind of familiar!" Oh, someone could even say, "Dude, you are *totally* ripping off articulatedcomics!"

Yup and yup.  But I hope AC takes this as an example of imitation being the sincerest form of flattery.

So far, I have removed the blade treds from the ice cutter.  Then I took out the screws in the bottom of the the cutter so I could get at everything.  Next I took apart a truck I bought at Target for its wheels and axles, and pulled out the wheels and axles. Its a battery operated toy, and I'm holding onto the motor because who knows what I kind of toy I could throw that into some day.  I removed the old grill from the cutter and drilled some holes into the cutter for the axles, and there she sits at the moment.

My next step is to dremel the unneeded parts of of the clipper attachment from my old beard trimmer (I'm clean shaven now and have been for years- the 90's are over, baby.  No more van dyke.) and then.... I get to paint the thing.  I was thinking an urban camo or jungle camo with spray paint, and man, that is the only step I am really worried about.  I'll deal with it when I get there.  I'll keep you all up to date as things move along.

Until next time.

David D. 


Rome wasn't built in a day...

...so why should I expect that I should be good at painting action figures right away?  Its good to have realistic expectations.  There is a big difference between thinking you can just pick up an action figure, some paints and create an amazing looking custom paint job and actually doing it. I'm new at this, and this is going to be learning curve.  Which is another way of me just saying I am learning to deal with the fact that my projects aren't turning out as nicely as I want them to at the moment.  But I know I'll get better with practice.  Here is a current recap on what is going on with one of my current projects.

Not going the way I planned.
I was near a TJ Maxx the other day and know that they often have GI Joe figures for really low prices, soI went it.  Low and behold, they had several older figures from the 25th anniversary line and some Rise Of Cobra Figures.  I purchased a Cobra B.A.T., Mercenary Wraith, and two Storm Shadows, all for $3.99 each.  Woo!   Each of these figures have really cool molds and would be great for future products.  And I had a plan for one of the storm shadows.

I did some research on the web to find tutorials on painting camo patterns on action figures.  I didn't find anything on action figures per se, but I did find some tutorials on creating camo patters on objects with stuff with spray paint on you tube.  The basic idea was this: Take three colors, and spray paint the entire object with the first color.  Put some paint tape over it in a stripe pattern.  Spray pain the object again with the second color.  Put some additional tape cut into stripes over that layer.  Finally, paint the object a third time.  After that third layer has dried, remove the tape and presto!  You have a cool camo design.

I thought 'hey, I am using acrylic brush paint and not spray paint, but this could work, right?' (See?  This is basic noob thinking).  I had some red and silver paint and was planning on buying some white.  I figured I would do a layer of red, let it dry, tape it, a layer of silver, let it dry, tape it, and a layer of white, and then remove the tape.  I figured mostly white with some cool red and silver stripes would look pretty cool on Snake Eyes.  Well, it didn't work out so hot.

There were two problems.  The first was that the paint would seep under the tape when I painted over it, so the old color was not being protected by the tape.  The second problem was that when I tried removing the pieces of tape to see how things were going, the paint on top of the tape would pull at the paint on the figure, resulting in a kind of rubber-y/latex-y/acrylic-y/stretch-y/hang nail-y like sections around the edge of where the tape had been,  Ug-ly.

So scratch that idea.  I went back to hisstank.com's custom forum and finally found a good how to paint camo on action figures thread, which I have started reading and will get more familiar with before I restart the camo ninja project again.

As far as Dora's concerned, nothing
is more interesting than her, and nothing
is more important than petting her.
When I was younger, I probably would be more frustrated with this than I am right now.  I am mildly frustrated, but I also really enjoy having the artistic outlet, so I don't mind making the mistakes.  I figure I'm learning a zillion ways NOT to paint my figures, so eventually through the process of elimination, I'll have to come upon the right way to do it.

Before I sign off, I thought I would add something more, even if it isn't hobby related. My wife and I have two cats, Booty and Dora, and Dora has been very intent on getting my attention while I wrote this post.  The computer I am using right now to write this posts sites on a desk built into the wall in my basement, and there is a little cubby hole under the desk surface proper.  When I use this computer and Dora wants to get in my face, but  knows I will push her away if she jumps in my lap, she jumps into the cubby hole and swats at my hands with her paws in an attempt to get my attention.  Well, Dora, congrats, not only have you succeeded in getting plenty of pats and scratches, you are also getting your picture on the internet.  Way to go!

Until next time!

David D.

Wednesday, August 31, 2011

The story of Alex Armstrong.

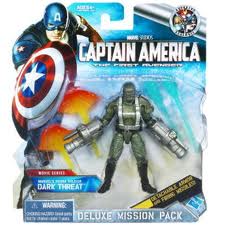
So I've been reading all these cool websites about customizing toys and getting all into it and did my first project (the Coyote - a few posts back).  And after that first taste of customizing toys, I realized I really liked it, and wanted to do more of it.  Walking through the toy aisle at Target a few weeks ago, I saw the Captain American Hydra: Dark Threat deluxe action figures.  Just looking at them, I thought they could be made to fit into my G.I. Joe collection universe.  I figured I would grab a few and think up something to do with them.

Stage 0: figure in the package.
A few days later, inspiration struck.  I would paint one red and black, and turn in into a crimson guard-esq heavy weapons type soldier.  I figured for this first project, I was just going to work on painting.  Actually xacto knifing a set of action figures and putting the pieces together would need to come later.  Baby steps.

I took my figure out of the package and took him apart as best I could.  He was so beefy I named him Alex Armstrong, after the character in Full Metal Alchemist, a series my friend Matt is a huge fan of.  In the show, Lt. Armstrong is a ridiculously over muscled and overly emotional agent of the government and ally to the two main characters of the series, the young brothers Edward and Alphonse Elric.  There was something in the figure's sculpt that struck me as a little flamboyant (especially if it was painted red) and that a character like this might himself too seriously, and that made me think of Lt. Armstrong.

Stage 1: figure disassembled.
Well, as in the case of the Coyote, I didn't know where to start, really.  Spray paint worked pretty well the past time, so I decided I would try with it again.  I split the figure into parts:  I stuck the figure in a cup of water I had microwaved for 2 minutes to heat up the plastic in the head so it was flexible, and popped the head off.  I unsnapped his belt and then I removed his webgear.  His guns/fire/ice blasts I decided to leave alone.  No painting for them.  So far so good.

And then I got out the spray paint.  This did not go as well as I had hoped.

Step 2: not the look I was going hoping for.
I found a red Krylon brand Fusion For Plastic line can of spray paint at the store, set up a little spray paint spot in the backyard with an old cardboard box, and slowly and carefully went to town.  Unfortunately, the paint pretty much all pooled in the lower areas of the figure and did not apply themselves to the raised sections of the figure's exterior at all.  I posted some help requests on various action figure customizing forums to see if anyone had any advice, but I didn't get any posts back.  I had read about using short, smooth motions with the can, but it didn't seem to be doing the job.  The the paint left the figure looking like a mess, and I worried that by the time I used enough paint to cover the raised elements of the figure, all the shapes and details of the sunken aspects of the figure would have down out and covered over by the paint.  I needed a new approach.

I went to the hobby store and purchased some acrylic paint and some brushes.  I had read online about doing a base coat of a light or dark color to make things really stand out, but I wasn't sure which way to go- light or dark.  Since the figure was already red to begin with, I thought I would just keep that up and painted the entire guy, his head and his webgear red.

It didn't look too cool.

Done! Paint applied and ready to go.
It looked kind of lame, actually.  But it was time to add the accents.  I painted the boots black, as well as the straps on the action figure itself.  Now it started to pop.  I used tiny brushes to try to get the details in correctly.  It took a *long* time to paint, and to make things harder, I actually only have one eye.  My right eye was lost in an accident when I was an infant, (today I have a fake eye in my right eye socket) and this made it pretty difficult to get the tiny brush exactly where I wanted it, and it also led to some frustration when I would dab a bit of black on a well painted red section, or the other way around.  I figured out a way to watch the shadow my brush cast on the figure I was painting to determine how close the tip was to the place I wanted to paint.  I don't have the steady hands of a surgeon however, and mistakes were made (over and over and over again), especially right at the edges of where I wanted one color to stop.  Straight edges are hard to accomplish with a paint and brush.  I'm not sure if I should have used paint tape or not- does that work with action figures?

When I was happy with how things looked, I spray painted it with clear spray paint.  I had read on the web that this would protect the painted colors from wear over time.  However, about 24 hours after spray pointing the figure, I noticed that a lot of the black layers had cracked a bit, resulting in red from below showing through.  I did some repainting and fixed it up.

I was also worried about heating the head up again with hot water to make it flexible enough to pop back on the body.  My acrylic paints, when wet, we water soluble.   Would they stay on if the paint was dry?  Did it make a difference if the water was hot?  I did more research and found out the hair dryers also do the trick.  I propped the head on the end of a pencil and held it in front of my wife's hair dryer for a minute or two, and it softened up perfectly, and fit right back on the body.  No need to worry about messing up the paint job with water.

I was not thrilled with the final result, but I was proud of the effort I had put into it. I wish it had turned out better.  Many of the custom figures found on websites like TheTerrordrome.com and HissTank.com are clearly built and painted by people who have substantial skill, knowledge and experience in the art of painting things; far more skill, knowledge and experience than I have.  My figure does not hold a candle to theirs, but as I said, I'm proud of the fact that I tried something new, the effort I put into it, and the fact it didn't turn out awful.  I am working on another custom project, this time a small vehicle, but a post on that will have to wait until later.

Until next time, have a good one.

David D.

Tuesday, August 9, 2011

Coyote Follow up

Sorry officer. I did not realize gatling guns
are forbidden in school zones.
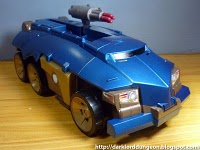
Just a quick post to point out a few other folks online have published content online their experiences customizing the Iron Man Rolling Battle Headquarters, the toy I used to create my G.I. Joe Renegades inspired Coyote and deserve mention.  Dark Lord Dungeon has a fantastic review of both the toy itself before he customized it and photos of his very nice gun metal blue paint job, which makes the thing look more like the GI Joe Rise of Cobra R.H.I.N.O.  Check out his blog for more cool pics and a very nice write up.  He did some really nice work there.

I should also mention ArticulatedComics version of the Coyote, which got me started on this little quest in the first place. There are no photos that I know of online, but here is the movie he made. He did a great job both with the custom and the film itself. Here is his youtube clip:


AC wasn't finished after that project. He customized a second Iron Man Mobile Battle Headquarters to make a cobra vehicle as well. This time, he added some parts from the Pursuit of Cobra line Cobra Fury to really snap the thing up. Again, I could not find still photos of the project, but here is a movie he made featuring this item, and its just as good as the previous one:


Clearly, the Iron Man Mobile Battle Headquarters has lots of customizing possibilities for whatever toy line or group faction you would like to incorporate it into. It is hard to find on the shelves these days since it has been on sale for almost 2 years, but I just checked and found it on amazon.com for $12.00. $12.00!!! If you are looking for a first custom project or want to practice your painting skills, this is a great piece to work with.

*UPDATE* I found another cool custom projects built from the IMMBH: a new ride for Destro.  Dake on TheTerrordrom.com uploaded some really nice pictures to a custom thread there and gota good reaction.  In addition to the tight paint job, Dake did some nice work with the decals.  All in all, a really nice project.

Until next time,

David D.

Monday, August 8, 2011

Custom Project Part 2

So when we last left off, I had my toy disassembled and on an old bed sheet used as a cover in painting projects around the house.  Things were going pretty well.  I followed [http://www.youtube.com/user/articulatedcomics|Articulated Comic]'s advice and used a short, flowing motion with my spray paint with the intention to do a few thin layers instead of lots of paint in long, heavy bursts.  I did have some dripping out of the can; this may have been because I didn't shake it up enough. (Man, shaking a spray can for two or three minutes when you haven't done it for a while is enough to make you nuts.  Those little ball bearings inside the can are *loud*.) It may have been the angle I was holding the can, since the objects I was spraying were on the ground and the can was above them, or it could have been the heat. It was about 90 degrees outside the day I did this, and the can warning said the paint should be used in temps between 50 and 90 degrees Fahrenheit.

Looks great until you try to pick up the pieces.
But it didn't look bad.  After a two passes over the course of half an hour, the red color in even the deepest red parts had gone away.  I decided it was time to flip things over.

And therein laid the problem.  Because I had used a bed sheet, the paint had seeped into it, and the fibers from the bed sheet had adhered themselves to the paint. Disaster.  My parts looked fuzzy.  Which is not the look I was going for on the coyote, an urban assault SUV/APC crossover designed to strike fear in the hearts of cobra aligned action figures near and far .  Thank goodness, a small amount of rubbing my fingers over the dry paint was all it took to remove the cotton from the paint.  Better yet, it didn't leave marks or imprints on the paint itself.

So now what?  I didn't want to put the pieces down on the dirty garage floor, and I didn't want to put them back down on the sheet.  Thank goodness we had some plastic sheeting in our yard shed from a retaining wall project from a few years ago.  I washed the dried dirt off with the hose, let it dry for a bit, and made that the new sheet for the project.  I did another four or five coats on both sides, which was also a bit of a mistake.  Problem number 1: the toy would smell like paint for at least a week.  Problem number 2: paint was think in some of the hinge spots and places where the toy comes together, such as the elevator folds in to the back of the vehicle when the toy is in vehicle mode, making for a tight fit.  But it looked pretty good.

I had been thinking about straying everything with a clear paint to keep things from rubbing off, but for whatever reason (laziness?  Not knowing if it would actually work?) I decided not to do this.  

My wheels!  My beautiful wheels!  They look horrible!
After letting everything dry, I brought all the parts back into the house for reassembly. When I pulled the tape off, I saw that there were several places the paint had gotten in- the wheels did not look nearly as good as I would have hoped they would.  I didn't know what to do, but I improvised.  I got a small cup of mineral spirits and some q-tips.  Harkening back to days of yore when I had to clean the connectors on my original 8 bit Nintendo, I dabbed the q-tips into the spirits and then rubbed them over the paint on the wheels.  Back in those days I used rubbing alcohol instead of paint thinner, but this worked just as well here as it did back then: the paint came right off.  After a few minutes on each wheel, it looked like there had never been any paint on them at all.  I used a paper towel to dry off the paint/thinner fluid mix from the wheels.  It looked much better.

The right lane is for passing.  Or else.
It didn't take long to screw all the parts I had taken off back in and to reassemble everything back together, and I gotta say, it looked nice when I was done.  I threw on some of the stickers (I put on the Start Industries sticker, and decided Stark Industries was a contractor for GI Joe equipment and vehicles in my little toy world) and it looked even better.  I also threw on some additional stickers that I had left over from some of my other joe vehicles, and they made it look even MORE better.  It really is amazing how much stickers add to the visual effect of an action figure scale toy.

Over all, I was really happy with the experience of working on this first custom project.  It wasn't nearly as hard as I initially thought it would be, and all the problems that came up could be solved with very little extra work and no additional cost, which was a big plus.  And it looked good when I was done.   This is a cool looking toy, and a great addition to my collection.  I know that Hasbro is going to release Renegades themed Joe action figures.  I was disappointed when I saw that they are not planning on releasing a Roadblock action figure, because I would love to put him in the driver's seat. At the moment, I have Beachhead driving the thing and have made my Coyote the primary APC of my urban commando GI Joe unit.  More about them in a future post. 

Saturday, July 23, 2011

Customization project: begin!

If you hang out at action figure websites for more than a few minutes, you learn that the next step after collecting toys is *customizing* toys.  This can be as simple as popping the head off of one action figure and putting a different one on, or it can get really complicated: original toys can be heavily modified both by taking them apart and by adding spare parts, modeling clay and paint to create a very different item.  I was wowed by the results of different projects posted around the web.  I saw threads that included pictures of custom work on hisstank.com, theterrordrome.com and even found a website 100% dedicated to action figure scale toy customizations at joecustoms.com.  The creativity and sheer awesomeness of the projects made me want to do some custom work of my own.

Raw ingredient number one.
I had a few ideas.  I had seen the Iron Man Rolling Battle Headquarters vehicle at Target on clearance for a few weeks.  I figured it was a great candadate for a repaint in order to bring it into the GI Joe universe, but oy... I haven't done any custom work before.  Where do I start?  What do I do?  How do I turn an idea into a cool custom and not moderately expensive messy disaster?

I lucked out.  While doing some searches on youtube, I found a great movie featuring custom work on this very vehicle by a guy whose YouTube handle is ArticulatedComics.   I figured 'what the heck.' and shot him an email, telling him I loved his work and wanted to know if he would give me a few pointers for my own project.

And provide me with pointers he did. AC was nice enough to show me the ropes of custom work.  Take it apart as much as possible before hand, he told me.  Check out the places you think will be difficult to paint and remember them."  He also recommended getting krylon fusion for plastics spray paint, and thought the project would probably take two cans of the stuff.

Ready to rock.
With that advice, I figured I could try this out.  I purchased the toy for $20 (down from $30), and got two cans of paint at the hardware store.  I took the toy apart as much as I could.  It took me about half an hour to do this with a regular Phillips screw driver.  Four large parts of the toy snapped right off without any problems, but there were several others that did need to be unscrewed. I covered the sections of the toy I did not want to paint with painters tape and hoped it would keep them protected.

I brought it all out to the garage and put down a paint sheet.  This ended up being my biggest mistake, as I found find out shortly.  You can give a guy plenty of advice, but lack of experience and insight will still get ya.   For more on this custom adventure, you will have to read the next post.