Showing posts with label success. Show all posts

Thursday, October 20, 2011

We done, baby. We done.

Well, its official.  The Build-A-HQ project has been built. This morning, I cemented the last video panel in, just above its one inch styrene conduit, waited 30 minutes, and called it complete.   Here are the photos.

Busy night in the TOC.
First a shot of the Tactical Operations Center itself.   I played around with a few different figures, but Cover Girl, Pit Commando, (aka Red Shirt), Helix, and Mainframe just looked the best staffing the workstations themselves.  I put Mainframe's computer next to him on the back wall desk, and General Hawk's briefcase computer next to Cover Girl. They are nice accessories and fit in well here.  I've got Sargent Stone briefing General Hawk in the front.  The graphics Vexar Designs made to go with their Build a HQ design are fantastic. I purchased both clear and white project paper to print the graphics on, and my advice for anyone else trying this is to print your decals out on the white paper, and trim the white edges off.  The clear paper, especially when it is being placed on dark styrene, ends up looking too dark and the stickers become hard to see.  The white paper keeps the ink fresh and bright regardless of what color styrene you put the decal on.  If you have to use clear sticker project paper, use it for graphics that are going to go on white styrene surfaces.

Snake Eyes is glad to be home.
Next up we have the lobby; Scarlet and Snake Eyes are back from who knows where.  Ripcord is clearly happy to see Scarlet back, and Duke keeps an eye on the feeds from the security cameras around the base.  Oh yeah- one thing I still may do is build a little Cisco IP phone for Duke to have at the reception/security desk so he can keep in touch with the rest of the base.  Back before I started grad school, I worked at an IT company and we all had IP phones on our desks. They looked pretty cool.  They were also completely redundant, because when you have IP phone systems, you can actually answer your phone using your computer itself.  We all had wireless headsets anyway, so we didn't need a phone handset or a deskset.  There was a little app we had installed on our laptops to place calls choice voice mail, etc, and any calls themselves placed using this app would be routed via Bluetooth to our headsets, which we were always suppose to have in our ears.  But people are just used to having phones on their desks.  I think having an IP phone at the security/reception desk would just be a nice touch, and as soon as I can find an image I can turn into a decal, I am making Duke his own little deskset phone, which is technically unnecessary, but something I think will look cool and useful on his desk.

Stg. Stone updates General Hawk on global ops status
Ok, here are Stone and Hawk.  Check out the beauty and detail in Vexar's decal images. In this picture you have a world map with different hotspots in red, a satellite image at the Pit Commando's left workstation (lower right side of the image), a sound wave analysis of Destro's voice and a work screen at Helix's workstation (lower left side of the image) and a keypad just to the right of Hawk on the right middle section of the image.  Vexar spent some time putting these things together.  I printed them up at highest quality on my HP deskjet printer, and they look crisp and near lifelike, as if they could plausibly be the kinds of screens one would see on computers performing the various tasks in a tactical operations center.

Scarlet checks in.
At my old job, the company I worked for was global and dealt with some security related services.  In one of our buildings, we had a TOC with a window between it and the lobby so potential clients could walk past and be impressed with our sophistication.  I never worked in that room, but I knew people who did.  They said it was actually a pain in the ass to work in there because while they always had the newest hardware, that also meant they were also always fixing bugs in the new machines and that everything in there felt like it was for show instead of actually being useful for the business.  Which I'm guessing was probably close to the truth.  

In the next image I've got going here (just above this paragraph) is the lobby from the right side.  You can't see Duke's keyboard or mouse (yeah, I cemented the mouse to the desk- it isn't going anywhere, and I decided it was a wireless mouse, so I didn't have to make any kind of cord between it and some part of the desk.) You can see the Exit, keypad and security screens decals here.  I think we kind of have a love triangle going on here between Scarlet, Ripcord and Snake Eyes.  Sorry Rip, I've got my money on SE.  He's got the strong silent type thing *down*.  Nothing personal, but that is what Scarlet is into and I don't think anyone can compete in that arena with Snake Eyes.

Helix, Mainframe, Cover girl and Red Shirt process their feeds.
Ok- Next image is of the TOC from the left side  Yes, the first thing I will always see here is the fact that the right most screen of Cover Girl's workstation is about 1/16th of an inch lower than her other computers.  I could try to pull the screen off and re-cement it, but the desk itself is *extremely* fragile, and comes disconnected from the rest of the dio if you look at it too hard, much less try to pull a piece of cemented styrene off of it.  I have thought about redoing that screen many times, but the fear of having to fix who knows what else keeps me from doing it.  I'll just have to live with the results, even if it gives me the heebie jeebies. I think Mainframe and Helix would make a good team together.  Helix strikes me as a kind of computer wizkid, and Mainframe looks ever the tech guru, like the kind of guy who writes COBOL code in his sleep, whereas she is more a Ruby on Rails kind of girl.  Yes, I don't think you'd ever seen developers or engineers working a TOC in real life, but its a flavor thing.  More than techie, I am going for a non-combat look in the TOC, and there aren't many non-combat looking figures in the GI JOE universe.  Beggars can't be choosers.

Never a dull moment.
Here it is- the entire thing on one overhead shot.  I don't know if I mentioned it before, but all the chairs swivel. None of them can turn a full 360 because the back of the chair bumps up against the desk, but none of the chair backs will hit each other in this dio, so I can have my TOC staffers turn to each other for a conversation or have Cover Girl or Mainframe twist to check out the computers next to them on the desk.  Everyone could turn toward the back of the room if they needed to give General Hawk their full attention.  Duke, in his security desk seat, can spin there too.  It gives a little action feature capacity to what is otherwise a cool but utterly frozen in time diorama.

Well, that is it for this project.  I'm thrilled with how it went, and I hope you like the results.  I do have some plans for a next project- Dr. Mindbender is going to get a robotics lab from Cobra Commander and work on the next generation of cobra food soldier there.  Before I work on that project, I may work on the long neglected Clipper custom.  I should give that one some time.  It has been sitting on the edge of my workstation for a long time now.  ::sigh:: that means I'm going to have to brush paint again.  We'll see how that goes.

Until next time,

David D.

Wednesday, October 19, 2011

Work stations done!

Ok- getting close to the finish line here on the Build-A-HQ project.  I have finished the work stations in the Tactical Operations Center, which is three computer screens at four locations, each screen made up of three rather tiny pieces of styrene and cut just so to match each other, and to fit little computer screen decals.  Each station also has a little white keyboard with keyboard decal on top as well.  Doing the computer screen step was actually one of the most tedious steps of the entire project so far, and for what felt like the least amount of work, but once everything was glued in, none of that mattered.  Everything looked absolutely amazing. Check it out for yourselves.  

I took these pictures as soon as I was done cementing the screens and keyboards in place.  If you think they look good like this, you should see what they look like with actual little action figures at each station.  They look *sweet*.  Since the last set of pictures I posted on the project, I have redone the stickers for the map display on the back wall of the TOC, the Exit sign above the lobby door, the fire alarm by the reception desk, the "No unauthorized personal beyond this point" sign at the reception desk, and the keypads by the lobby door and in the TOC itself.  The last set of stickers had been too small; when I figured out how to print everything out at the correct size (see the "sticker update" post about this) I decided to pull the old ones and redo it them.  The correct sized stickers look much, much better than the small ones. 

There are a few things I still plan on doing.  I have at least two more monitors I am going to post on the common wall between the lobby and the TOC, on the TOC side of things that will have visual data for the TOC.  Those are not up yet.  And in the time between when I took these pictures and wrote this post, I have done some touch up work with a paintbrush and some paint to fix some cement stains on various surfaces of the model.  The stains my have been too small to see in these pictures, but I'd really like to get everything looking good before I finish this bad boy and put him up on the shelf full of figures.  I didn't want to have any steps left undone that I will spend the next few years noticing and thinking 'Jeez that looks like crap' so I went ahead to did the touch up work.  As I sit here typing, the paint is drying and leaving very little indication that it was ever there, so that's cool. I was worried it would really stand out from the white and black styrene, but nope- its all good. 

What else is there to say?  I'm not sure how much longer it is going to take to finish this bad boy.  Maybe another hour (knock on wood) at most. I've painted up a white styrene dowel in grey to match the walls of the TOC to look like conduit that will run between the table and the two new monitors that will go in there. I haven't cut the styrene for the monitors, but I have plenty of scrap that will be the correct size and have the decals that will be the images themselves all ready to go.

My last issue is figuring out which figures are going to staff the TOC. At the moment, I am thinking Mainframe, Helix, Cover Girl, and Pit Commando.  These figures seem to be the most appropriate dressed (save Helix) for TOC work.  What I would really like to have in there would be the figures from the Toys R Us Troop Builder 5 pack, which included Dial Tone, Footloose, Law and Order (without the dog), Zartan, and Repeater. These figures are all in fatigues and would look great in the TOC, but I can't find it for sale anywhere at the moment except on eBay, and the five pack is going for about $45-$50 including S&H there, and I'm going to have to save my pennies for a bit to pick that up.

I need to run pretty quick, so I'll end this post about here. Thanks for keeping up with this project.  It has been so much fun to work on.  I've done my share of screw ups, but I've learned from each mistake and this thing really looks cool.  No mistake thus far has been a project killer; when I cut a section of styrene too small, I can recut it.  When I cut it too big I can sand it down.  When paint gets where I don't want it, I repaint.  This is very forgiving.  Its also a fun in that each step makes the display much cooler, so I never feel like my time or energy was wasted.  I hope you like the pictures.  I think there is a good chance the final product pictures will be up soon.

Until next time,

David D.


Wednesday, October 12, 2011

Sticker update

Hey- I figured out what was wrong with my sticker sizes that I printed out from Vexar Designs.  My printer was fitting the images to page instead of printing them at 100% size.  I was pretty weirded out by the fact the stickers were so much smaller when they came out of my printer and were up in my dio then they seemed to be in the pictures on Vexar's website, so I did a little digging.  It turns out that the print size control is in the page preview option, not the print option itself in firefox/Windows Vista.  When I went to the print option in the file menu and said print without changing the settings in the print preview option, it just fit everything to the page.  Not what I wanted!

At least I have only made 3 of the computer screen before I figured this out.  I think the dio is going to look much better with the full sized computer screens, and with the full sized stickers.

One more thing- I have been wanting to thank the person or persons behind Vexar Designs, and I found him on Hisstank.com- user name Freedom.  It was great that he took some time to pop into the forum where I have been posting updates on this project.  Freedom, thanks for your comments and thanks for your design. 

That's all I've got for now.

Until next time,

David D.

Sunday, October 9, 2011

Chairs made and stickers up!


Peg warmer Duke is now warming the security
desk chair in my soon to be completed GI Joe
Lobby and Tactical Operations Center model.
Well, its been a busy past few days in Lake Woebegone.  Got the chairs made and am starting to work on the computers.  I got some sticker project paper from Office Max nearby, both the clear sticker paper and the white stuff for the decals, and have started putting it all together.  So far, so good.  Its a slow slog, especially with the computers.  Each computer screen is three pieces, and there are going to be a total of 12 computers and four keyboards.  It'll take some time to get all that cut and ready, but its looking good in the mean time.

The chairs were super easy.  I was not sure if I'd be able to bend the styrene well, but all it took was a little exposure to a small flame, as discussed in the project instructions. I used a candle lighter we had in our junk drawer, and I did it outside and with a mask on, because I figure styrene fumes are probably not the best for my health.  Turns out that a few  seconds of flame exposure makes styrene super flexible.  Just to be safe, I marked the parts of the plastic where I wanted things to bend, and put the flame on each face in the zone where I wanted it to bend- front, back, and both sides.  I was not sure if the heat would be conducted through the plastic, and I'd rather not snap good material.  I probably held the plastic just above the tip of the flame for about seven or eight seconds per side for a single round- I didn't need to heat sides again after I cooked them the first time.  It worked so well on the back of the first chair that I kept doing it for the remaining four, and had no problems with any of them.

Chair in place, stickers coming along, and all I really have
left are the computer screens.  I hope to have this thing done
in the next few days.
I printed the decals from page three of the decals website at Vexar Designs (again, thanks very much Vexar).  They printed out a little small. It seems to me that they should be between 50%-100% bigger to be the same size as they look at on the Vexar Designs site pictures, but I'll manage.  If I do this again, I'd try using an image editing program to increase the size of the stickers by 50% and see how that works, but the moment is passed.  Nothing looks really bad, and actually, the stickers make things look much, much cooler, as they always do when it comes to GI Joe related stuff.

I also noticed (learning tip!) that any stickers that are going to end up on black styrene really need to be printed on white paper, because if it is on clear, it vanishes when it is put over the black background.  Made that mistake with the world map on the back war of the Tac Ops center, but it isn't too bad.  There are plenty of decals that will be stuck on white styrene that clear stickers will find a home someplace.

Other big learning point: I was hoping this item would be strong enough to actually handle play like a playset would.  Well, not so much.  The desks themselves are very fragile.  Not the entire structures, but if you put more than a little pressure on the desk surfaces, they pop right off whatever they are glued to.  This styrene set is going to be more of a diorama than a playset, but that's cool. It looks pretty sweet.

I need to get back to cutting black styrene for the computer screens, so I'll end this update here.

Until next time,

David D.

Wednesday, October 5, 2011

Desks up and How to Cut Styrene.

So far, so good.  Glad the painting stage is over.
Well, the painting adventure is over.  Cotton balls + mineral spirits got rid of the non plastic paint with no problems at all.  The next coat of paint went on and everything looks great.  ::phew:: that's nice.  I was worried the surfaces were going to look like crap forever.  One problem solved. So that was cool.  After the paint situation was resolved, I went on to add the desks, both in the tac ops center in the back and in the lobby.  The desks themselves are made from black styrene, the same stuff used to make everything else. 

Except this stuff is black, not white. 

I have some little piece work left to do: print out the decals from the website on some sticker project paper, and making the chairs and computers.  That will involve a great deal of cutting styrene sheets but I'm not too worried.  During this project, I have become a master at cutting styrene sheets.  I have wanted to do a 'how to cut styrene for beginners' tutorial for a while, and I may as well do one now since I have some time and I'm on the subject.  Here we go.

How to Cut Styrene

You will need: 

1. A  sheet of styrene
2. A pencil
3. A ruler/Straight edge
4. An Xacto knife/Razor/cutting blade of some sort.
5. Sandpaper (if you screw up.)

Recommended:
6. A desk/work bench makes things much easier.

1. Use a ruler to measure out the length of styrene you want on one side of the styrene sheet.  Mark point for length you using a pencil with a little dash mark on the styrene. (this works on white and black styrene.)  So if you have an 21x8 sheet of styrene and want a 6x8 panel, go 6 inches up from one end on the 21 inch side and mark a dash at 6 inches.

2. go to the other side of the sheet, and do the same thing.  So now you should have two dashes, both 6 inches away from the end.

3. Now flip the styrene over so the flat surface that was on top is now on bottom.  Do steps 1 and 2 again on the other side. 

4. Repeat steps 1 and 2 again to make sure you measured correctly from the ends (measure twice, cut once isn't a joke, and it will save you time if you screw up.) 

5. After you confirm (or remark) your dash marks with a pencil, use a straight edge, such as your ruler, to draw a line between the two dash marks.

6. Repeat step 3, which is to say, flip the styrene sheet over, double check your measurements.

7. Now repeat step 5 on the other side of the styrene sheet.  Use your straight edge to draw a line with your pencil to connect the two dash marks.

8. Now take out your knife.  You can use an Xacto knife, a razor, whatever.  I also use the straight edge, and score the styrene along the pencil line you just drew.  On one side of the styrene.  You can use the straight edge to guide your knife, making sure the score is straight.  Repeat this at least three times in one direction.

9. Important Note: you do not need to cut all the way through the styrene.  You just need to score it.  I spent a LONG time on the first few cuts of this project because I carved all the way through the styrene with my xacto knife.  I don't recommend it.  Learn from my mistakes!

10.  Now, score the line in the opposite direction at least 3 times.  If you were going right to left the first time (in step 8), now score the styrene from left to right.

11. Flip over the styrene.  There should be an unscored surface with a pencil mark facing up, and the scored surface should be facing down.  Repeat steps 8-10 on the other side.

12. Now you are done with your knife.  To be safe, first put the xacto cover back on your xacto knife or adjust your razor so it slides back into the tool's handle.  Stage 13 is going to be a little violent, and you do not want sharp objects around where sudden motions take place.

13. For best results, place the styrene on a flat surface, such as a desk or work bench, with the scored line right at the edge of the table or desk and the part you want to break off hanging over the table or desk.  Apply steady pressure to the styrene, with one hand on the part you cut to use in your project and one hand holding the part you want to have left over.  You do not have to do this quickly.  The first few times you try this you may not feel exactly how much pressure you need to place on the styrene to get it to break.  The styrene will bend.  Do not worry, it will snap back straight again when the piece breaks off.

14.  Very suddenly, the styrene will snap apart.  If you scored the styrene well, the line will be a very nice flat line.  If it was less well done, you may need to do some minor sanding to make the break line clean.

The key to this entire process is scoring the styrene well.  If you do good straight cuts, the break lines will be pristine.  Yes, you can just do one side of the styrene, but when I have tried going fast, in my experience it does not goes nearly as well.  Score both sides of the sheet.  The lines are much finer and need zero sanding to get what you want. 

Congrats!  You have cut your styrene!

I'll update this post soon with pictures for the styrene cutting steps.  Until then, enjoy the words.

That's all I have for now.  Until next time.

David D.

Monday, October 3, 2011

additional pics


Detail of the door to the lobby section of the HQ, with some
of the wall sections on the left side of the frame.  Not too
shabby, and very easy to do.  If I can do this, *anyone* can
do this.

For some reason, I didn't post some pics in previous posts on the Build-A-HQ project, but they are pretty good in progress images.  Here is one I thought I would include in the blog I so you can see what the parts looked like during construction.  If you have not worked with styrene before, you would be amazed at how easy it is to work with this stuff.   I still need to do my 'how to cut styrene' post, and I will.  In summary: its easy, and the stuff looks good (as you can see from the pictures) with very little effort.

After all of the frustration I had trying to paint action figures (see the Alex Armstrong story, and there are even more projects I have worked on that were so bad I didn't even make blog entries about them.  That should tell you something.) It was *great* to work on a project that is more or less working out for me.  If you are thinking of trying to put together a little dio for your action figures, I recommend this the Vexar Designs Build-A-HQ project.  Try it out.  Its really easy and it looks great.  You'll be happy with the results.

Until next time,

David D. 

Friday, September 30, 2011

State of the HQ

Well, I got a lot of work done on the HQ today.  And I've learned a lot about working with styrene.  The styrene lessons learned discussion will go in a future post, but I wanted to do a quick update on how things look with the model itself.

It took a while to get this far, but was surprisingly easy to build.
As you can see, I pretty much have all the white styrene parts together.  I'm planning on spray painting what I have here with Krylon Satin River Rock color paint, and then putting in the desk and counter tops, which will be made out of black styrene. 

If you haven't had a chance to go look at the plans over at Vexar Designs, what you are looking at are two rooms.  The first is an entrance which will have a desk facing a front door.  The next room will have four chairs and four computers and a tv monitor on the back wall. I may also throw some TV monitors in the common wall facing the computer center- it will depend on how things look at that point.  Right now, the design in 22 inches long by 8 inches wide.  I do plan on building additional spaces after this project is done.  Hallways will go immediately left and right of this section, and a mission briefing room/dojo is planned for one side, and a conference room and General's office is planned for the other side.

Welcome to the HQ.  Made by David
Construction, not in any way affiliated
with Halliburton.
So far, this has been a fantastic project.  It takes patience, but it has not been difficult.  The instructions at Vexar are fantastic.  I figure this section will be able to display 4-8 Joes easily and should look pretty cool when complete.  Like I said before, I do plan on doing a "how to work with styrene" post based on everything I picked up building the HQ thus far. I don't want to get into that topic too much here, but I will say that now that I've spent a few hours scoring, shaping, and adhering the stuff, its easy to use, and much easier to use than when I first started working with it.  When you prepare cuts correctly, it splits into very clean sections on very fine lines.  Pencil shows up well on it, so its easy to mark things down.  Its great for building models and for projects like this, and the stuff a far stronger than foam board.

On the other hand, it does look like the stuff is really bad to breath in, so I've been wearing a face mask that I got from the grocery store.  Its the kind of mask that you see people wearing in epidemic movies.  I'm using it to cut down on the possibility of breathing the dust in when I sand the styrene down. I have a ventilation fan going, and I have been washing my hands every time I get up to do something else after I am done working on my project.  And if the styrene dust is bad, I think the fumes from the "plastruct bondene", the cement used to bond it together, is probably horrible.  It sticks like death and you can taste it even through the mask.  I don't want to know what kind of crap it does to the human body.  It does say that "this product contains a chemical known to the State of California to cause cancer", on the back of the bottle, so that is lovely.  I also read that this stuff can be absorbed through your skin, so I've been really careful about not dumping this junk on me.  But it does get the styrene to stick together is seconds, and cures in 30 minutes, so hey, it could kill me, but it makes the model building go quickly.

Until next time.

David D.

Saturday, September 24, 2011

First Custom Figs!

As easy as this was to do, they look pretty sweet.
Well, I did it.  I made my first custom figures (using processes that involved altering figures in ways that do not include repainting the figures) today.

Yeah baby.  I'm in it thick now.

Ok ok, its nothing too exciting- one of them was just a head switch, and the other is a head switch with some dremel work.  But I think they turned out pretty well.

I ran over to TRU today while doing some errands to see if the Renegades wave was in yet- I haven't had any luck all week finding the new figures, even though it sounds like there are out in a lot of other parts of the country.  The TRU I visited did not have them, but they did have almost the entire first wave of the 30th anniversary Joe figure line except for Hazard Viper, but that was cool because I already have that wave.  But I got to thinking... man... that Iron Granadier is one cool looking figure.  His head is cool, his armor is cool, his weapons are cool... wouldn't it be awesome to see if I could hollow out his helmet and put a Joe head under there so they could run around in an Iron Granadier disguise?

Sgt. Stalker was there too, and I gotta say, this guy has one of the best head sculpts going.  He just looks badass.  I knew that something would have to happen with his hair to get the idea to work- I'd probably have to use my xacto knife to remove it, but what they hey.  So I picked up two Iron Granadiers and one Stalker.  I had a Rise of Cobra Duke sitting in a box of figures I had picked up at TJ Maxx not long ago to be used for parts.  And say what you want about the movie, I really like the head sculpt of that Duke figure too.  I figured I'd try making a Duke in IG costume and a Sgt. Stalker in IG costume, both with removable helmets, and see how it went.  Ideally, both would work out, and if I screwed up with one helmet, I'd still have the one more to work with.
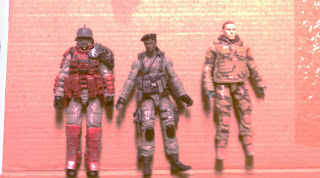
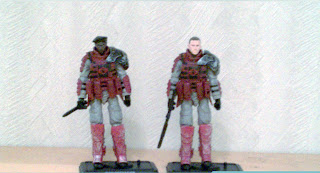
Here they are: after the win but before the fall.
Ok- I got home and got the packages open.  Bad news. There is no way I was going to be able to get the IG helmet over the Duke or Stalker's melon. I had noticed that it would be tough to get Stalker's beret in there back at the store, but once I had the figures out and the heads popped off, it was pretty clear that even though the helmet looks huge on the figure, it is almost exactly the same size as the heads for Stalker or Duke.  Just hollowing the helmet out was not going to work. Time for a new plan.
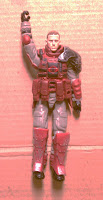
Yo Joe!
And one came.  When I popped Duke's head on the IG figure, it looked pretty sweet.  Really.  The details in the armor and the details in the head worked well together.  The color pallets were completely compatible.  Even without a removable helmet, this was a pretty cool looking figure.  It would look even cooler with the helmet, but that would take some work. I'd need to make the helmet longer- perhaps that would mean hollowing the thing out, then cutting it into a front and back half and adding some apoxy or whatever to lengthen the thing.  And that would take a bit of work, not to mention supplies and expertise that I didn't have at the moment.  I was looking for a simple win with this project.  My first first custom figure was a situation where I bit off a bit more than I could chew, and I didn't want to repeat that adventure.  I'll be honest- this was a confidence building exercise.  I wanted it to work out, I wanted something that looked cool, but I also wanted to do something that was within my competency level.
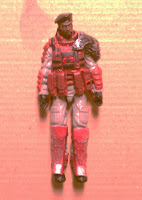
I may be an E5 and Duke
an O4, but he WISHES
he looked this good.

When I put Sgt. Stalker's head on the peg to get an idea of how it would look, I was impressed.  Again, the detail of the head worked well with the detail of the rest of the figure, and again, the color pallets were complimentary.  Sgt. Stalker has a much more hardcore look than ROC Duke, and if I could get this to work, I thought this would look like the much nicer figure.  I could not put the head all the way down on the peg however, because the back of the collar of the Iron Granadier was in the way of Stalker's dreadlocks. It would have to go, and perhaps, the handle on the back of the armor would need to go as well, since Stalker's dreads fall down along his back.
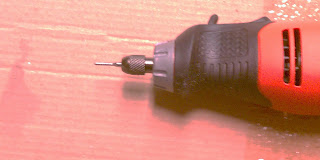
Mini Sanding Tool is a go!
I purchased a Black & Decker Dremel from Target a few weeks ago knowing that if I kept things up with this little hobby of mine, I was going to need one sooner or later.  I also grabbed some additional dremel bits because the actual kit came with very few on its own.  I threw the 'light' sanding tool into the dremel and figured there was a first time for everything. I really hoped I wouldn't destroy the figure.   But I had a plan- I would start using the tool on the "low" setting and go as slow as possible.  Kind of like starting a drilling project with the smallest bit; you can't blow it too bad if your bit is smaller than the screw you want to put in the wall (or whatever.) Same deal here.  If I needed more umph, I could always dial it up. 
If you don't like it put a black dot on it.
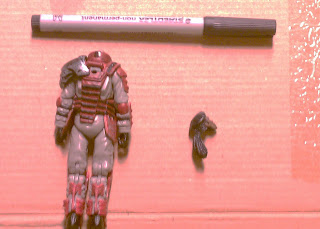
I also checked out the part of the collar where it seemed to intersect with Sgt. Stalker's hair and marked it with a black felt tip art marker. I figured I could use that to tell where I should be focusing my sanding work and give me a visual.  Being the safe guy that I am, I also threw on some plastic goggles.  It would turn out I didn't really need them, but this was my first run and I wasn't about to risk my eyes on a project.   I also took the armor off the figure itself, as I figured I could damage the body in some way if I kept it on there, and didn't want to risk that.
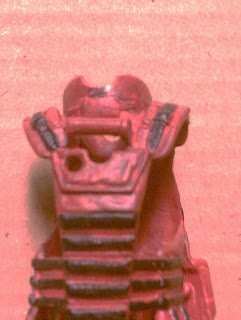
Dremel work in progress.
 And then I just jumped in with that dremel.   The goings were slow.  The kind of plastic the armor is made out of just did not give much on the low setting.  So I pulled the tool away from the figure and decided, 'here goes nothing', and set the speed adjustment to 'middle'.  And then it was a whole new ballgame.

The dremel tore threw the plastic like a smart phone enabled scalper threw a fully stocked toy store. I used short, brief motions to dremel small portions of the plastic away because I figured that if I held the dremel on the plastic for more than a few fractions of a second, it would slash right threw it.  After some progress, I would put the armor back on the figure, and then try Sgt. Stalker's head on the thing, to see how it lined up and where I needed to do additional work.

All in all, it worked out really well.  I got the collar chiseled out just right so the hair passed through it where the hair is bound up, and even better, the way the dreadlocks spread out covered the gap int he collar.  I also did some dremel work on the handle-looking section of armor that stands out from the back of the figure below the collar line so the hear could rest closer to the back of the figure. Again, I would dremel a bit, then test with the Stalker's head to see where more dremeling was needed, and after a few iterations had a nice set up.  Stalker can't really turn his head too successfully in this set up, but he looks pretty cool standing and looking straight ahead.

And that's it!  Both Stalker and Duke look great in their new Iron Granadier customs.  It didn't take much work to do, but I'm calling this a win on account of the fact it was an original idea that I came up with and it ended up looking sweet, and because I was able to accomplish what I set out to do, and because I got some experience with the dremel and didn't destroy any action figures to the point that I couldn't create what I set out to create with the items I had when I started the project.  So- success!  Woo!

Until next time.

David D.

Training session with Sgt. Stalker.

Ok maggots.  Lets go over some close quarters defense when you are in gigantic
movement confining armor suits you grabbed off of an enemy trooper.

Because you never know when one of their buddies is going to show up
and try to stab you in the back with a huge ass knife.

They key is to pay attention, and to react as quickly as possible.  Grab their wrist using
self defense technique one echo niner, (You should all have that practiced after your session
with Snake Eyes) and give the guy a toss over your shoulder. Leverage is key.  Make sure you
use their momentum to help them on their way.

Now that you have the guy on the ground, you should be able to take them out.  Crush their throat,
gauge out their eyes, maybe just knock 'em out in case you want them for questioning later.

And that concludes this demonstration here today.  Remember what you saw here and stay loose.  And
remember not to never to come up short at the bar, or you'll owe me one and that'll mean you could
end up serving as a practice dummy for my next martial arts demonstration.  Right, Duke?